This time around, we shall cover How To Bake Sharpie Onto Mug. Obviously, there is a great deal of information on Sharpie Mugs In Oven on the Internet. The rapid rise of social media facilitates our ability to acquire knowledge.
information about Best Markers For Ceramic Mugs is also related to How To Seal Sharpie On Ceramic Mug and how to make sharpie on mugs permanent. As for further searchable items pertaining to How To Make Sharpie Mugs Dishwasher Safe, they will likewise have anything to do with How To Decorate A Mug Without Baking.
47 Tips to How To Bake Sharpie Onto Mug | How To Make A DIY Sharpie Mug That’s Washable!
- or nail polish remover before drawing can help the markers to adhere better. It’s not necessary, but could help. (I use this technique in making , too.) Practice your design on a piece of paper before writing on the mug. - Source: Internet
- Place the mug on a baking sheet and put it in a cold oven. Turn the oven to 350 degrees and bake for 30 minutes. When the baking time is up, turn the oven off and allow the mug to stay in the oven until it is completely cool. - Source: Internet
- My mom has always been a fan of lilacs, so that was a no brainer. I started by making sure the mug was clean of oils by rubbing it down with rubbing alcohol. Then I set to work scribbling some lilac-ish shapes and then using the rubbing alcohol and a stippling paint brush (the kind you dab up and down instead of brush with) to make the impression of hundreds of tiny lilac flowers. The stems were drawn first in Sharpie marker and then lightly brushed over with a paint brush dipped in alcohol, which made them look painted on. - Source: Internet
- Once the oven is done pre-heating and has reached 425 degrees, leave the mugs in the oven and set a timer for 30 minutes. As the mugs bake, the paint may start to smell. The smell is normal, but you can open a window or turn on a fan to help air out your kitchen. - Source: Internet
- I paired the pretty mug with the K Cups and they are all ready for my mom! I hope she loved them. (I know I’ll be making a mug for myself this weekend. I can give myself Mother’s Day gifts… right?) - Source: Internet
- So, this is the process you must follow to make a paint pen coffee mug that’s completely personalized according to your likes and favorite colors. You can also coat it with a layer of mod podge or clear spray paint to keep the painting intact. But who would want these chemicals to go into the mouth? - Source: Internet
- Sharpie mugs have been popular for a few years and here’s why, they are personal, really fun to make, and a pretty inexpensive gift to give. A few weeks ago I had my Activity Day girls make these (along with some homemade hot cocoa mix) and they had a great time! This was a perfect project for those 8 to 11-year-old girls and they came up with the most creative designs to go on their mugs. One girl drew their family cattle brand, one made the mug handle into an elephant nose, another did a fun snowman family, and yet another made the cutest panda mug. My kids made mugs to give as part of their teacher gifts, and I made a few to stick in the mail and send to friends. If you google “sharpie mugs” you’ll get a million ideas for designs, funny quotes, and different simple things you can put on your mug. - Source: Internet
- The best way to clean your Sharpie mug or other ceramics is to gently wash them with a soft sponge and dish soap. Keep them out of direct sun. They will stay gorgeous for a long time! - Source: Internet
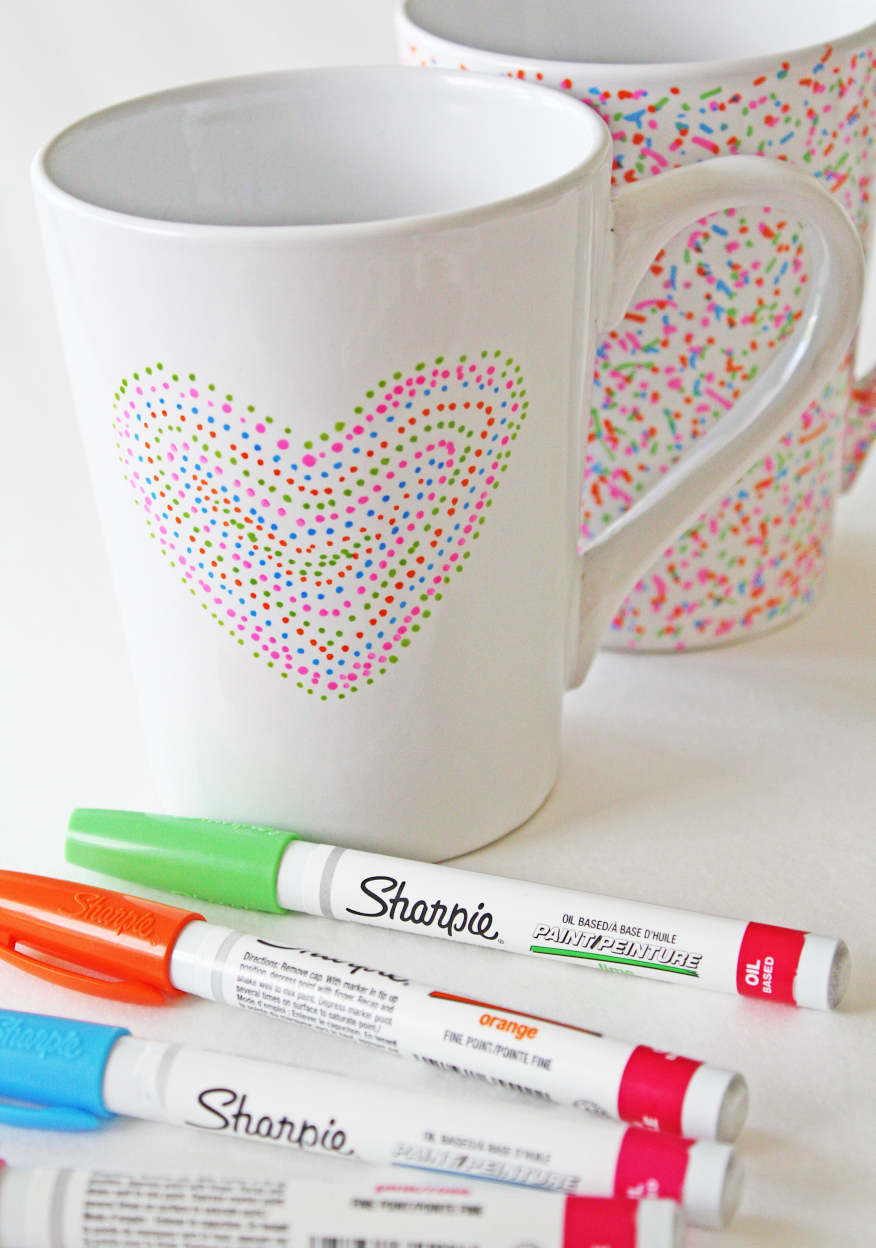
- Step 2: Using a variety of different color Paint Sharpies, scribble circles of color all over the sides of the mug. (Tip: I would avoid the metallics for tie-dye mugs — they end up just looking muddy after they run.) - Source: Internet
- We got to say, paint pen mugs are all over the internet these days. They are super easy and fun to make with just a few supplies and markers. At the same time, you can give your dull and boring coffee mugs a really cool makeover using Sharpie paint pens. Plus, you can use a variety of colors to add beautiful details to your mug. - Source: Internet
- It is very important to put your cold mug in the oven before you pre-heat it. You want the mug to warm up as the oven warms up. Otherwise, your mug could crack from being cold and going directly into a hot oven. - Source: Internet
- For those who want to decorate their mugs with images and typography-based designs, this medium paint marker set is a good bet for your painting needs. The markers are not too thin, which enables you to fill in the art designs with color. In addition to paint pen sharpie mugs, these colors are also ideal for rock painting, scrapbooking, window, fabric, and poster surfaces. - Source: Internet
- Use old newspaper or paper towel to protect your work surface from the permanent markers. Wash your mug with soap and water, dry it, and then wipe it with rubbing alcohol. Allow a few minutes for it to dry. - Source: Internet
- My fellow bloggers believe that cheap mugs work best because of the inexpensive glaze they use. Something to keep in mind! (I got this tip from 21 Tips for DIY Sharpie Marker Mugs.) - Source: Internet
- Dry and bake your mug following the directions further down the post EXCEPT, in the case of the tie-dye mug, you should bake it at a lower temperature (350 F) for one hour. After it has cooled, spray it with a clear coat, such as Krylon Crystal Clear Acrylic Coating Aerosol Spray. The tie-dye mug needs to be treated a bit differently because the ink is diluted and thus easier to fade. - Source: Internet
- Once these mugs are baked, you can definitely hand wash them in warm, soapy water. The paint doesn’t come off if you lightly scratch at it with your nail, and it won’t come off with handwashing either. I have tried these in the top rack of the dishwasher as well, and they were still fine when the dishwasher was done! (The dishwasher definitely puts more wear and tear on the mug, so I don’t know how well the paint will hold up years from now. For the longevity of the paint, I suggest handwashing the mugs, but if you need to throw them in the dishwasher, they’ll still survive!) - Source: Internet
- I bought a new mug at the Dollar Tree, but you could easily use old mugs from at home. Or find inexpensive mugs at thrift stores or garage sales. Heck, even Walmart and Target have really cheap plain mugs. - Source: Internet
- This pack of sharpie paint markers comes in fine point and fifteen different colors. The paint pen markers work well with ceramics, pottery, and virtually any surface like glass, plastic, metal, paper, stone, and other surfaces. The color dries quickly, creates a smooth design, and doesn’t fade easily. The markers are also water resistant and abrasion-free. - Source: Internet
- DO use stickers or stencils to create fun designs on your DIY plates and mugs. I gently stuck a speech bubble to a plate and then used the black paint marker to outline it. I let the marker dry before carefully removing the sticker. You can also use letter stickers like in this kid-made scribble mug. - Source: Internet
- So, what do Sharpie markers, the alcohol technique I shared in the DIY Domino Necklaces and Dishwasher Safe Mod Podge have in common? This gorgeous mug that I made for my mom. I knew when I decided to give her the Sentiment KCups that I could really get her a mug to go with. After weeks of searching department stores, I sat down at my craft table with a blank white ceramic travel mug, my markers and some rubbing alcohol. And Look at how pretty it turned out! - Source: Internet
- Then it was rinse and repeat. A total of 4 coats for this lovely creation. There is no baking involved! Just let the mug cure (Mod Podge recommends 28 days) and you are good to go on the top rack of the dishwasher. I’ve got a friend who used the Mod Podge with a glitter mug and its still going strong after 5 years of use!! - Source: Internet
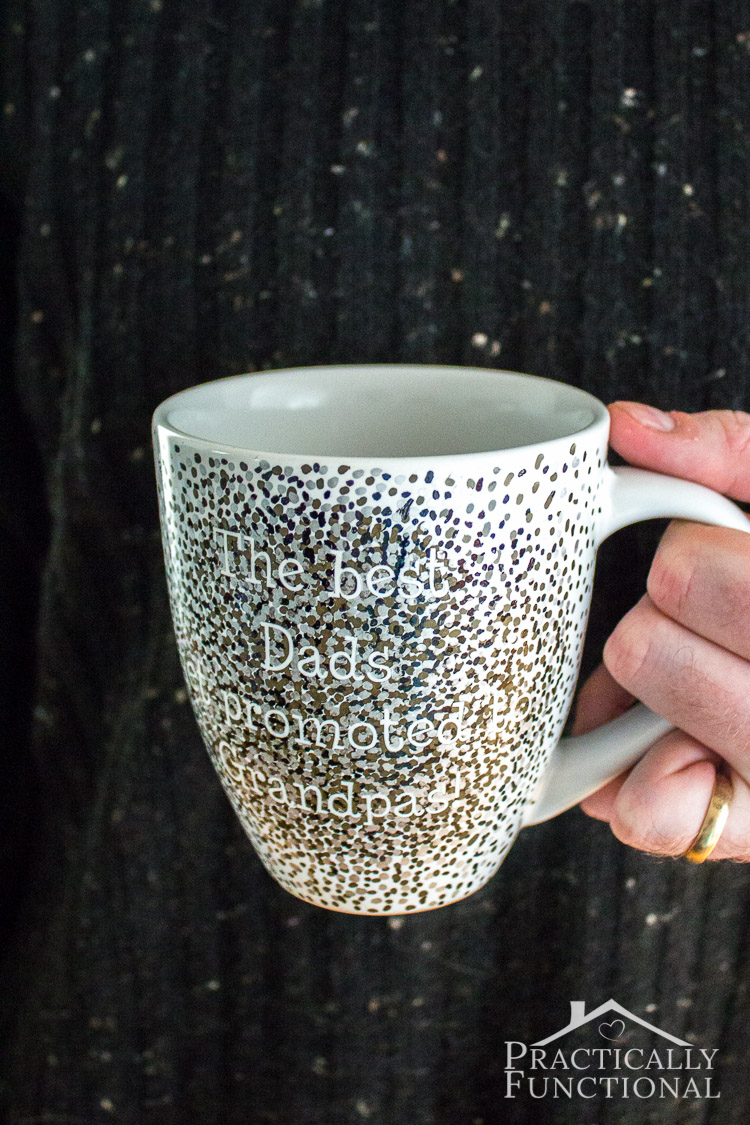
- I used my Silhouette Cameo to cut out text from a scrap of adhesive vinyl. You can also use stickers, but I wanted a specific phrase, so I made mine custom. 🙂 (By the way, if I had to do this again I would use a thicker font; in the finished mugs the font is totally legible through the polka dots, but it’s not super obvious from far away.) - Source: Internet
- Baking the mug before using it is essential to ensure that the sharpie ink doesn’t come off. After drying the mug, bake it in the oven for about thirty minutes at a temperature of 350°F. The mug should be placed in the oven before the oven gets all warmed up and taken out only after it has completely cooled down. This is to see that the mugs don’t get any cracks. Like the drying process, even baking can be done twice to ensure the paint pen set in well and water won’t wash your art design off the mug. - Source: Internet
- You want to choose plain mugs that have as little glaze, or shininess, as possible. Also, be sure the mug is as clean as possible, with no oily fingerprints on it. See helpful tips below. - Source: Internet
- Once baked, the mugs are safe to wash. Some people say it’s fine to put them in a dishwasher, but it really depends on the mug and the dishwasher, and if it fails, it’s too late. Use the acrylic coating spray on your mugs to make them dishwasher safe. If you’re still worried just handwash them to be safe. I always prefer to wash the tie-dye mug by hand. - Source: Internet
- Step 2: Start drawing on the mug with your Paint Sharpie. You could do something as simple as a name, a loved one’s nicknames or pet names (this is our favorite). You could also draw a cute picture. Whatever you think your recipient will enjoy! - Source: Internet
- In this earlier tutorial- DIY No Bake Sharpie Bowls, I explained in detail why you should NOT bake your sharpie creations. The main reason is that Sharpies or many other kinds of permanent markers are not designed to be baked. They lose their colors and will not be embedded into the ceramic glaze. - Source: Internet
- After 24 hours, put your mugs in a cold oven on a cookie sheet. Then start preheating the oven to 425 degrees. Some other Sharpie mug methods say 350 or 375, but the hotter the oven, the more the original white glaze will melt and allow your Sharpie paint to set in, so I like to bake my mugs at 425. - Source: Internet
- Clean your mug again with rubbing alcohol and allow it to evaporate (this takes a few minutes). Avoid touching the surface you intend to put the paint Sharpies on with your fingers, as your oil can cause the paint to not adhere properly. I like to put my hand inside the mug while I decorate it. - Source: Internet
- Put some rubbing alcohol on a cotton ball and rub all over the outside of the mug (where you’ll be painting it). This will help to remove any residues that might encourage your paint to not stick. - Source: Internet
- Now that you’ve learned how to create a sharpie mug on your own, let’s have a look at some of the best paint markers you can use. We’ve already mentioned that oil-based paint markers are great for mug surfaces, and there are quite a few paint pen options available in the market. The best paint pens listed below might help you narrow down the option and make a decision. So, here we go with the top paint pen sets: - Source: Internet
- You can make graphic designs or lines by using masking tape as a stencil. Or use stickers to use as outlines. Take the tape or stickers off before baking the mug. - Source: Internet
- DO place mugs and plates in a cold oven and set bake temperature to 425. Let bake 1 hour and allow to cool completely before removing. This should help prevent cracking. - Source: Internet
- DON’T use dollar store mugs and plates if you’re not. You may end up with random discolorations. You can see it in Madison’s “pasta” plate above. Next time I think we’ll try IKEA. - Source: Internet
- Rubbing your mug with rubbing alcohol, acetone or nail polish remover before drawing can help the markers to adhere better. It’s not necessary, but could help. (I use this technique in making decorated wine bottles , too.) - Source: Internet
- DO hand wash mugs and plates…unless you’re still feeling lucky, then by all means take your chances with the dishwasher. Or the dog. - Source: Internet
- Once you pick your paint markers, zero in on the art design you want on your cup. You can just go for simple typography, doodles or any other art design you think goes well with the mug. Browse through Google Images or Pinterest for inspiration, if necessary. Before you start the painting, do some trial runs on the paper, so you get it right because it’s almost impossible to get the ink off mug surfaces if you go wrong. - Source: Internet
- There have been hundreds of tutorials written about the Sharpie Mug method, some using plain Sharpies, others using the oil-based kind. Essentially, you write on a mug in Sharpie and then you bake it until the drawing becomes semi permanent. Sounds amazing huh!? Always excited for new ways of decorating my coffee mug, I’ve had that craft floating around in m head waiting for the right time. And truthfully, I’ve heard a few rumor that those types of mugs are not actually permanent. So, I’ve been leery about giving them as gifts. - Source: Internet
- I have used Martha Stewart Decoupage Formula which is a non-toxic sealer, dishwasher safe after 28 days of curing. The Mod Podge Dishwasher Safe Sealer works the same. The key is to quickly and gently put the first thin coat on the Sharpie mug, and do not go over an area back and forth with pressure. This will cause the designs to bleed. - Source: Internet
- Step 3: Once your mug is colored, slowly drip one drop of rubbing alcohol on each circle of color. Keep rotating the mug around, up, and down as the rubbing alcohol makes the colors run. If a patch of color seems untouched, add more rubbing alcohol to that area and continue rotating the mug to distribute it. If you end up with a bare spot, wait until the rubbing alcohol has evaporated, add another circle of color, and do another drop of rubbing alcohol. Repeat until you like the way it looks. - Source: Internet
- Getting your paint markers right is an important decision because you wouldn’t want the art to fade away from your mug surfaces. For highest quality results, it’s better to choose an oil-based paint sharpie as the regular one can come off even after you’ve baked it. As for the color of your paint markers, you can keep the colors it minimal with just one color; black markers are is usually the perfect choice for this. Or else, you can even go with a combination of different colors and shades if you want to make your mug more vibrant. If you have troubles choosing an ideal paint pen, we’ve got a few great suggestions later on in the article. - Source: Internet
- The fine tip on the markers works well if you want to doodle or draw some intricate designs on the mug, rather than any wordings or big dotted designs. The color also doesn’t change on baking as long as you’re setting at the right temperature. Plus, the colors stay it stays intact for a really long time, even with repetitive washes. - Source: Internet
- Decorate with paint pens however you’d like (I did not put any paint inside of the mug since I assume the paint is not considered food safe). If you make a mistake use a cotton swap dipped in rubbing alcohol to wipe away any mistakes. - Source: Internet
- Allow your design to dry for about 24 hours. Place the mug in a cold oven and set the temperature to 450 degrees. Bake for 30 minutes. Turn the oven off and allow the mug to remain inside for an additional 15 minutes to prevent cracking. - Source: Internet
- Start by washing your mug in warm soapy water to remove any stickers. Rinse and dry. - Source: Internet
- Start by cleaning your mug with rubbing alcohol and cotton balls. If you don’t clean the mug, the paint may be sitting on top of dirt and grease left by your fingers. This may cause the paint to adhere poorly while baking, which can cause it to wash off later. After you clean the mug, do your best not to touch the surface you plan to paint; hold the mug by the handle if possible. - Source: Internet
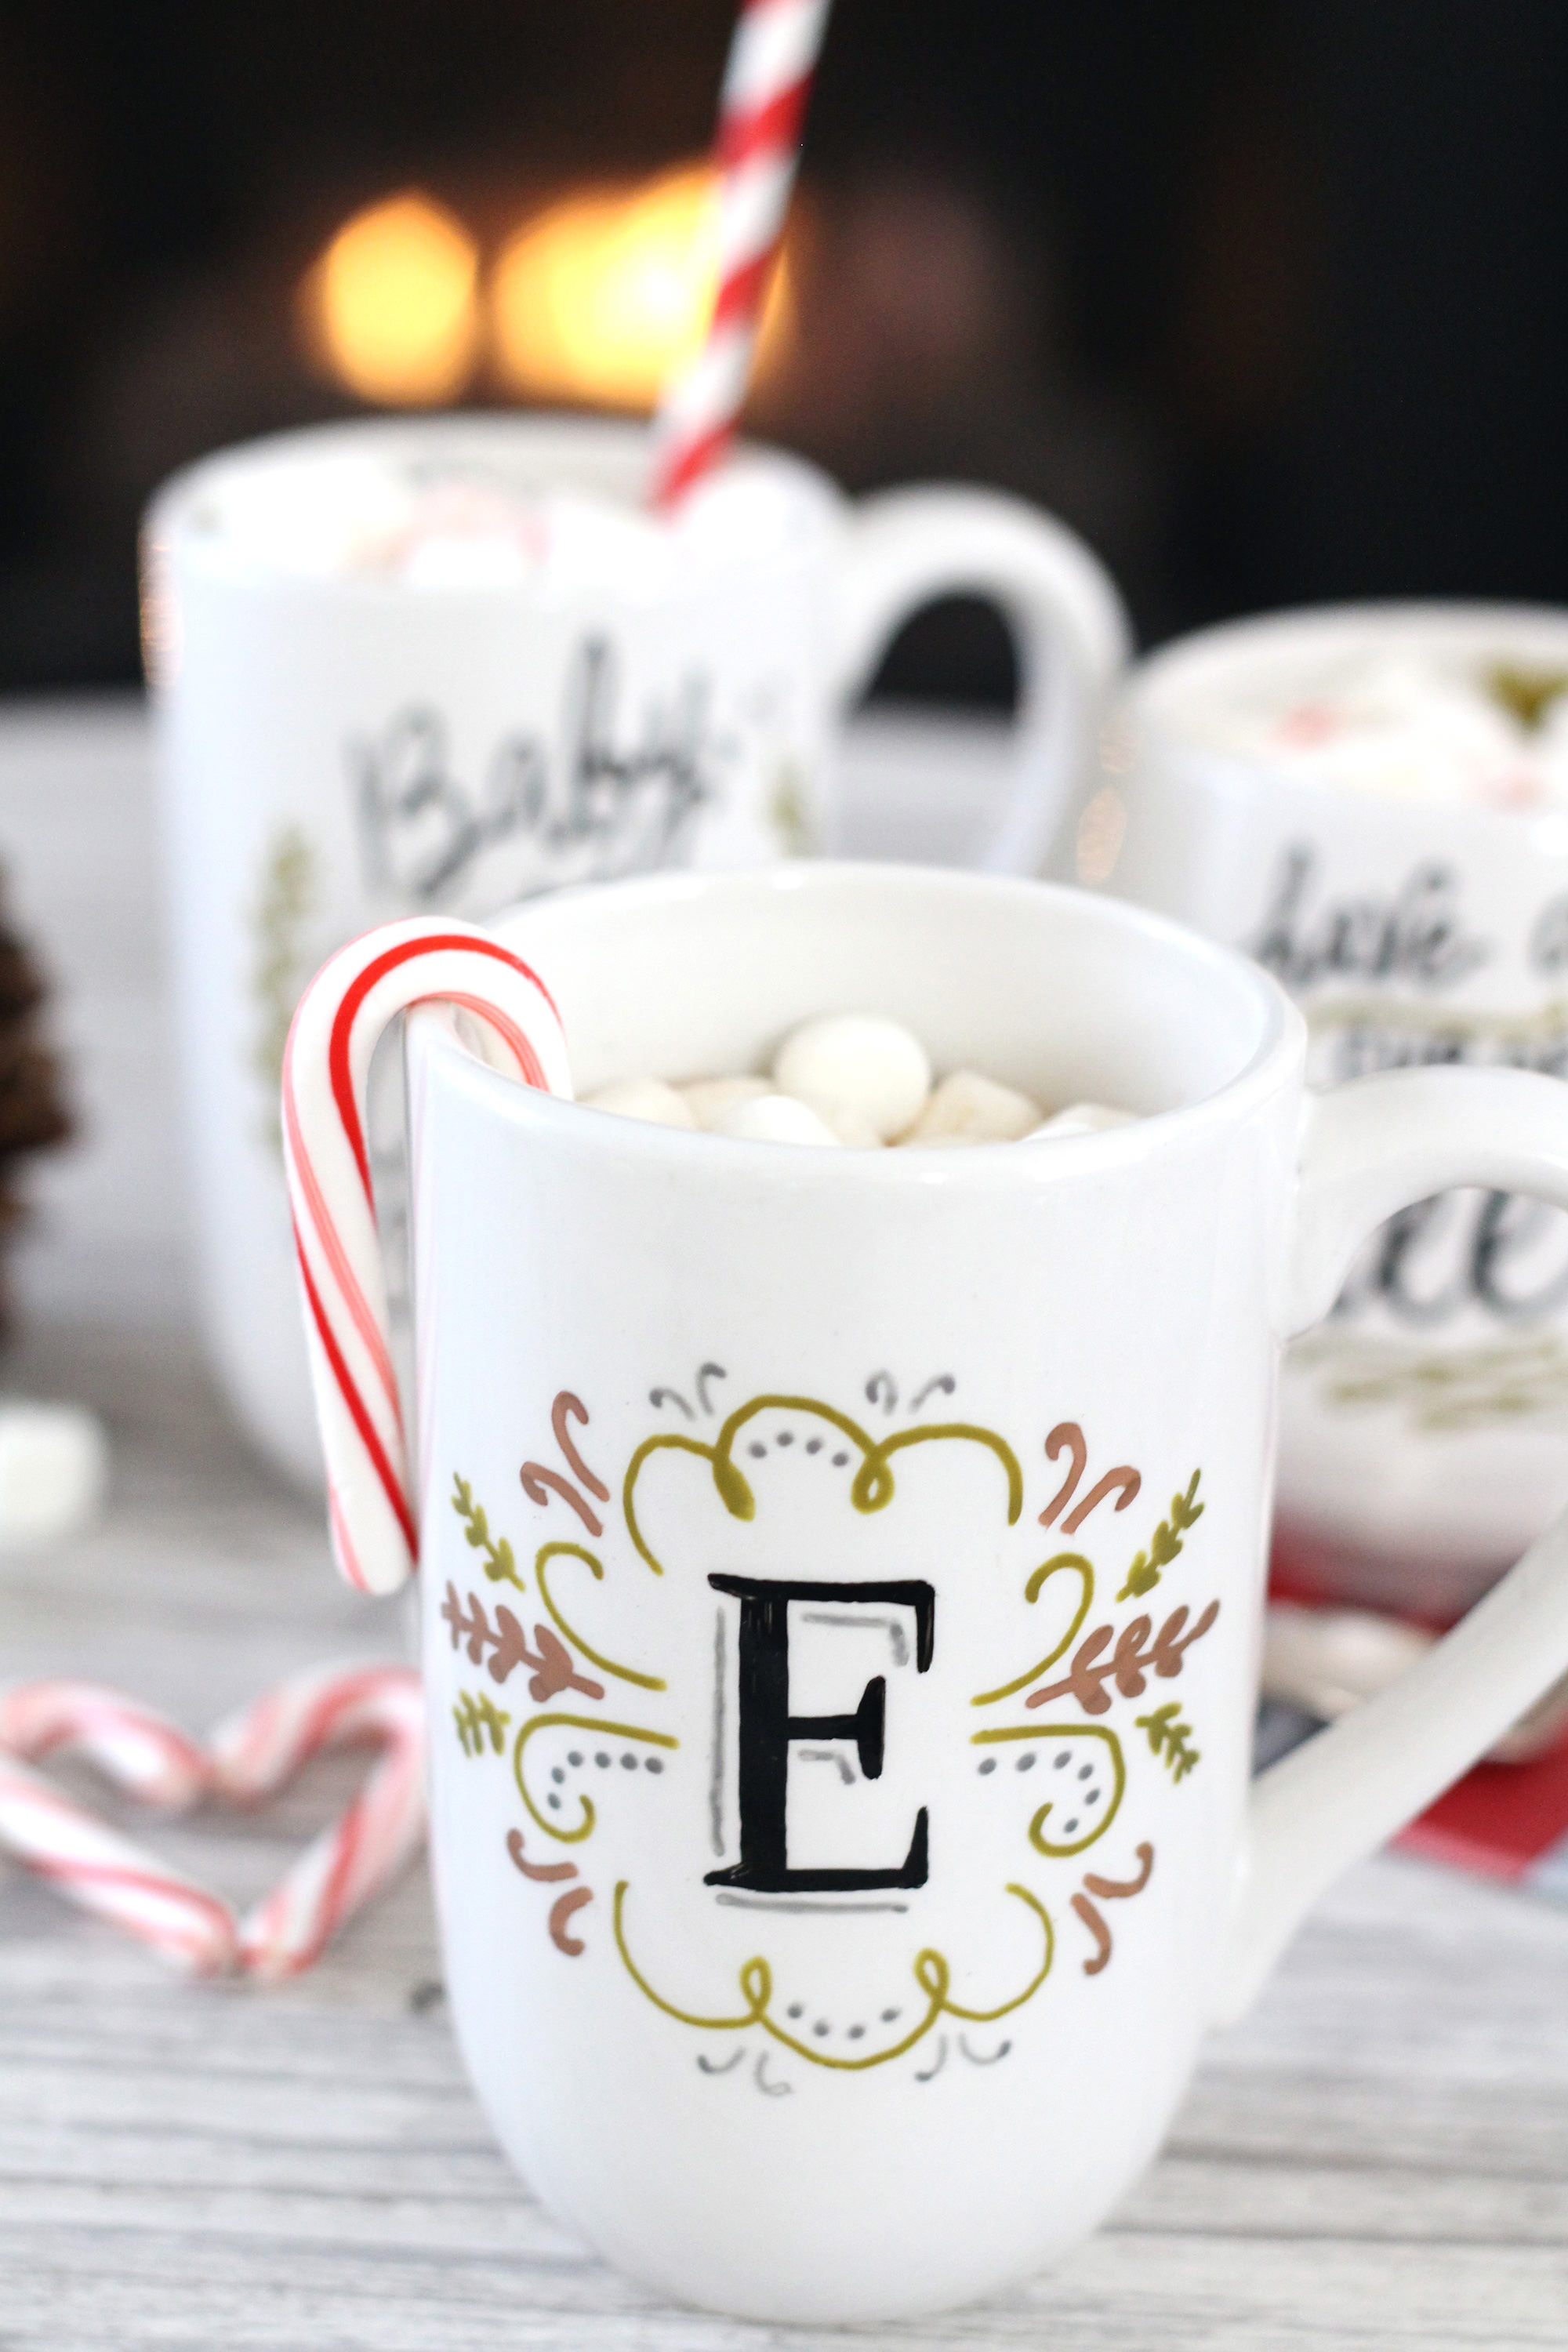
- I just love how personal you can get on these. You could do a monogram, add a favorite quote, make stick figures to represent a family, refer to inside jokes, or feature a favorite pet. The mugs my kids made for their teachers are so personal and really show their age. Grandma’s go nuts over that kind of thing too right?! - Source: Internet
 To begin started, here are some tips for finding information about Sharpie Mug Oven Temperature Celsius:
- Research Bake Sharpie On Glass-related information from credible sources. This includes libraries, websites, and even journalistic professionals.
- When researching DIY Sharpie mugs for gifts and party ideas, it is vital to be aware of the numerous sorts of electronic media sources, such as Google and YouTube. Social media platforms, such as Facebook and Twitter, are also likely to contain information regarding Sweet Anne Designs.
To begin started, here are some tips for finding information about Sharpie Mug Oven Temperature Celsius:
- Research Bake Sharpie On Glass-related information from credible sources. This includes libraries, websites, and even journalistic professionals.
- When researching DIY Sharpie mugs for gifts and party ideas, it is vital to be aware of the numerous sorts of electronic media sources, such as Google and YouTube. Social media platforms, such as Facebook and Twitter, are also likely to contain information regarding Sweet Anne Designs.Video | How To Bake Sharpie Onto Mug
To obtain the most accurate information about How To Decorate A Mug Without Baking, it is essential to investigate the credibility of each source by reading.
This article contains multiple How To Seal Sharpie On Ceramic Mug-related films from a variety of sources, which will expand your understanding about How To Decorate A Mug Without Baking. Internet is an excellent resource for getting information on a range of subjects.
## Here are some crucial points concerning how to bake sharpie on a mug:- How To Bake Sharpie Onto Mug
- How To Bake Sharpie On A Mug
- How To Bake Permanent Marker On Mug
- How To Make Sharpie On Mugs Permanent
- How To Make Sharpie Stay On Mugs
With so many websites and forums giving Watercolor Flower DIY Sharpie Mug {Anthropologie Style!}-related information, it is not difficult to locate what you require.
This is a highly unconventional method for obtaining knowledge about Easy Washable DIY Sharpie Mug {2 Steps}, compared to what most people are accustomed to. It permits a more in-depth examination of the content and application of information regarding Bake Sharpie On Glass.
 Methods for creating aesthetically pleasing and informative displays of How To Make A DIY Sharpie Mug That’s Washable! information. They can be utilized in business and marketing environments to convey messages regarding How To Set Permanent Marker On Ceramic. Consequently, we additionally supply photographs regarding How To Make Sharpie Mugs Dishwasher Safe.
This article concludes by providing an overview of Permanent Marker For Mugs. In addition, How To Make A DIY Sharpie Mug That’s Washable! and Regular Sharpie On Mug are discussed to compare your understanding of how to bake sharpie onto mug.
