This time around, we shall cover How To Remove Faucet Handle From Sink. Obviously, there is a great deal of information on How To Fix Bathroom Sink Faucet Handle on the Internet. The rapid rise of social media facilitates our ability to acquire knowledge.
information about How To Remove Old Faucet From Bathroom Sink is also related to I need help uninstalling my faucet and/or removing a quick-connector and how to remove faucet handle bathroom sink. As for further searchable items pertaining to How To Remove A Two-Handle Bathroom Faucet, they will likewise have anything to do with How To Remove Kitchen Faucet Handle.

45 Things About How To Remove Faucet Handle From Sink | How To Remove Bathroom Faucet Handle Without Screws
- Your faucet handle or knob will have a small cap located at its base. Pop the cap off with a small screwdriver. Use an Allen wrench or small screwdriver to remove the screw, then carefully use your hand or pliers to remove the handle of the faucet. - Source: Internet
- Depending on the problem, you may not need to remove your Kohler kitchen faucet. If your Kohler kitchen faucet is leaking from the spout or out of the handle, or the handles are too tight or too loose, then remove the handle to access the cartridge. Replacing the cartridge will fix leaks and mobility issues. - Source: Internet
- No matter what type of faucet you have, you’ll need to start by shutting off the water to the faucet. Do this by turning off the two shutoff valves located beneath the sink, or by shutting off the main water supply valve to the house. The shutoff valves are closed when you turn the handles clockwise as far as they will go. - Source: Internet
- The Spruce / Kevin Norris Remove Faucet Body Remove the faucet body from under the sink. Sometimes the faucet will fall on its own once the mounting nuts are removed; other times, you will need to tug on it gently to free it. It’s a good idea to place a thick towel beneath the faucet so that it doesn’t damage your cabinet or floor if the faucet assembly drops. - Source: Internet
- There will be a washer and a rubber o ring located on the faucet body. Remove these with your fingers. Remove the hub assembly by pulling it away from the faucet body. After years of operation, mineral deposits may prevent the hub assembly from coming off easily. In this case, use a pair of pliers to grip the hub and pull it away from the faucet body. - Source: Internet
- The brand of your faucet will determine how you’ll open it up. You might require a cartridge pulling tool for some faucets. In most cases, you can investigate and try to fix the problem yourself before calling a plumber. - Source: Internet
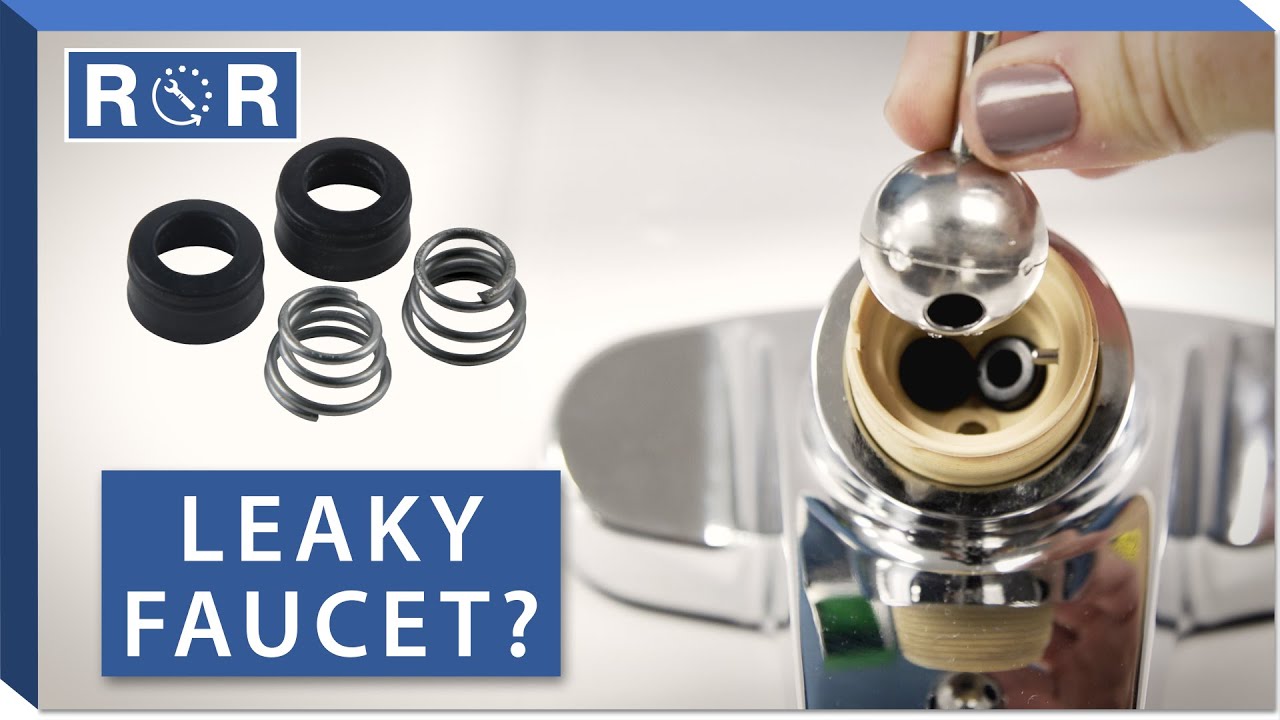
- If your faucet is leaking from the handle, you will need to replace the control cartridge. The cartridge is located under the handle. To remove it, use a hex wrench to loosen the set screw. Pull the cartridge out and take it to a hardware store to find an exact replacement. Install the new cartridge by pushing it into place and tightening the set screw. - Source: Internet
- As mentioned in the article, Kohler kitchen faucets may get loose over time. If this happens, don’t freak out. Simply visit any home improvement store and get the necessary tools and materials to fix it. With a little bit of patience and elbow grease, you should be able to remove your single stem Kohler kitchen faucet without any problems. - Source: Internet
- The first thing you need to do is to disconnect the supply lines. You can do this by shutting off the water valves that are located under the sink. Once the water is shut off, open the faucet to release any remaining water in the lines and use a towel to soak up any water that may drip out. - Source: Internet
- There will be a bonnet nut located on top of the faucet body. Use a wrench to loosen and remove the nut. If there is any mineral buildup, use a solution of vinegar and warm water to dissolve the deposits. - Source: Internet
- Step 1: Remove the Button On the front of the faucet, you’ll find a spout and two buttons for controlling the temperature. Use a flathead screwdriver to support the edges of the buttons as you click. Care should be taken when extracting or handling the buttons because they are delicate. The buttons are of medium scale, which allows them to drain comfortably. Furthermore, you have to make sure that you have covered the drain properly before transferring them to the drain. - Source: Internet
- If it seems stuck, wrap a towel around the end before using an adjustable wrench to twist it off. On your pull-down faucet, the aerator is surrounded by the spray face. قواعد لعبة البوكر Line up an adjustable wrench with straight lines on the aerator and firmly pull it out. - Source: Internet
- A bottom-mount faucet uses a design in which the bulk of the faucet body is found below the sink. Here, you’ll need to remove the handles and spout, then loosen and remove the mounting nuts holding the faucet from above. When these mounting nuts are removed, the faucet body can be dropped down and removed from below the sink. - Source: Internet
- Now that the stem has been properly lubricated, all that’s left is to reattach all the handle parts. Put the knob back in place and set the screw inside the channel. Turn the screwdriver counterclockwise to affix the screw in place. - Source: Internet
- Once the diverter is replaced, apply a small amount of plumber’s grease to all of the O rings. This will help to keep them from drying out and cracking. Reassemble the faucet in the reverse order that you took it apart. - Source: Internet
- Once back home, replace the cartridge (no new screw? Good thing you kept those old ones!). Once that’s in place, follow the removal steps in reverse order until your faucet is back in business. That’s all there is to it. Easy, right? Now, if you’d like to prevent future faucet handle repair, tighten the set screw any time the handle begins to feel a little loose. This should slow the stripping process and keep the water flowing for years to come. - Source: Internet
- Most kitchen faucets have an aerator that screws onto the end of the faucet. The aerator is what adds air to the water stream and controls the flow rate. You’ll need to remove this in order to get to the screen below. Use a pair of pliers and unscrew it counterclockwise. - Source: Internet
- If your faucet is showing initial signs of getting stuck, or you’ve been struggling with a tight faucet for some time, you should deal with it before failing to turn completely and keep you struggling to get water elsewhere. You can either contact your local plumber in Sydney or try to fix it yourself. If you decide to hire a plumber, check for special discounts that will help you save money on your plumber call out fee. - Source: Internet
- Once the screw has been removed, you should be able to pull the handle off yourself. However, you may need a specific tool like the faucet handle puller or a pair of pliers. - Source: Internet
- You’ll need to remove the faucet handles or ornamental cover plates, depending on where the faucet body connects to the faucet cartridge. Handles are often unscrewed with your fingers, whereas cover plates are removed using a flathead screwdriver. The connection screw may be either a Phillips head or an Allen head screw, and each requires its own tool to remove. - Source: Internet
- Use a pair of pliers and grip the cartridge. Then pull it up. In case the cartridge doesn’t move, determine your sink’s brand name and get a matching cartridge puller tool to assist with removing it. Upon removing it, inspect it for corrosion. Corrosion is the main cause of a faucet that won’t turn on. - Source: Internet
- Do you eagerly want to know how to remove kitchen faucet handle without screws? To learn how to remove a bathroom sink faucet handle without damaging it, you should know how to turn safely it off the sink first. Remove screwless faucet handle is very cool because it doesn’t need much effort and tools. You can follow these steps. - Source: Internet
- Tip Unless these supply tubes are relatively new, it will be best to replace them with new tubes when you install a new faucet. The Spruce / Kevin Norris Loosen Mounting Nuts Using a basin wrench, reach up behind the sink basin from inside the vanity cabinet and grip the mounting nut that holds one of the faucet valve tailpieces to the sink or countertop. Turn the nut counterclockwise (viewed as you look upward at the nut from below) to loosen it, and unscrew it down the threaded tailpiece. Repeat with the mounting nut on the other tailpiece. If access space is tight, you may need to remove the water supply tubes from the ends of the faucet tailpieces to provide more space to reach up with the basin wrench. - Source: Internet
- Stripped faucet handles are common occurrences in older homes. But what causes them? The wear and tear on the faucet stem, or cartridge, is frequently the cause. Over time, the set screw that holds the handle to the stem wears down. This can be caused by water build-up, corrosion, or simple wear and tear The set screw is what allows you to rotate the handle to turn on and off the water flow. - Source: Internet
- Before we get started, you may be wondering what caused the problem. It’s usually a result of wear and tear on the faucet stem, or cartridge. The cartridge attaches to the handle and the two components work together to control the water flow. When the stem becomes stripped, the handle will feel loose or just spin on end. - Source: Internet
- If you’re working on the sink, you can usually find the valve and handle right below it or within the cabinet it’s built into. Turn the handle clockwise—righty-tighty—to shut off the water supply. If you’re taking care of a bathtub, you’ll generally need to turn off your home’s main water supply. We also recommend covering your drain; it’s an easy-to-miss step that can result in screws and other items being lost forever. - Source: Internet
- It is not uncommon for shutoff valves to grow old and stop functioning correctly. If you find that water continues to dribble even after closing the shutoff valves, then you’ll need to shut off the main water supply valve to continue this repair. It also means you will need to replace the fixture shutoff valves as part of your faucet replacement project. - Source: Internet
- Use an adjustable wrench to remove the kitchen faucet nut holding the cartridge down. That way, you’ll see the cartridge. You can pull it by hand, or you may need needle nose pliers to help remove it. Now that the old cartridge is out, inspect it for any wear or damage. If there is any damage, you’ll need to replace the o rings as well. - Source: Internet
- Kohler is one of the best kitchen faucets with a sprayer available on the market. So, if you want to remove it, start by turning off hot and cold water supplies. Hot and cold shut off valves should be located under your sink. Turn them both to the right, and then try turning on the faucet to confirm that no water is coming out. - Source: Internet
- If your faucet has a cartridge, keep reading as you will next unscrew the top piece and expose the top of the cartridge. If the faucet does NOT have a cartridge, you have reached the actual faucet from which the water comes. - Source: Internet
- The “faucet handle goes past stop” is a common problem that plumbers run into. In 10 minutes or less, you can fix the problem with these steps. This is a frequent home issue that affects almost all handles over time. - Source: Internet
- Kohler faucets are built to last longer. However, rubber o rings and moving parts can wear out after extended use. If you notice a leak coming below the faucet handle when you move your spout from side to side, then the internal spout barrel o rings are damaged and need to be replaced. - Source: Internet
- Depending on where the faucet body attaches to your faucet cartridge, you’ll need to remove either the faucet handles or decorative cover plates. Handles can usually be unscrewed using your fingers, whereas the cover plates can be popped off using a flathead screwdriver. The connecting screw may be either a Phillips head screw or an Allen screw, each requiring their respective tool for removal. - Source: Internet
- The Spruce / Kevin Norris Remove Handles and Spout Working from above, remove the valve handles and spout from the faucet. Look for a hidden set screw that holds the handle or handles in place. The set screw for the spout is sometimes found under an escutcheon ring that can be lifted to expose the screw. - Source: Internet
- If you’re working on the sink, the valve and handle are normally located directly under it or inside the cabinet it’s built into. To turn off the water supply, turn the handle clockwise—righty and tighty. You’ll need to switch off your home’s main water supply if you’re taking care of a bathtub. Covering your drain is also a good idea; it’s an easy step to overlook, and it may result in screws and other objects being lost forever. - Source: Internet
- If your faucet is leaking from the spout, chances are it is because the bonnet nut is not tight enough. To fix this, remove the handle and use a hex wrench to loosen the bonnet nut. Once it is loose, smear some plumber’s grease or petroleum jelly on the threads. This will help to create a seal and prevent the nut from coming loose in the future. - Source: Internet
- The handle connects to the cartridge, and the two operate together to regulate the water flow. The handle will feel loose or spin on its end if the stem gets damaged or removed. When it strips the faucet handle, it can no longer grip the stem and can cause problems with turning the faucet on or off. - Source: Internet
- The Spruce / Kevin Norris Unscrew Mounting Nuts With the handles and escutcheon out of the way, you should see the mounting nuts that hold the faucet body in place. There may be nuts at both handle locations, as well as at the spout. Use channel-type pliers to remove the mounting nuts. Do the same for the spout mounting nut, if there is one. - Source: Internet
- Replacing old sink handles can actually result in a major overall of the look of your kitchen. And it’s fast and simple. So get ready for a fashion makeover for the kitchen, all with your own two hands. - Source: Internet
- Other problems you may experience with your kitchen faucet are the sporadic disruption of water flow when turning on the faucet and low water flow from the handheld sprayer. Fortunately, you can deal with all of these problems by taking the faucet apart and doing the repairs yourself. Read on to understand how to remove a single stem Kohler kitchen faucet. - Source: Internet
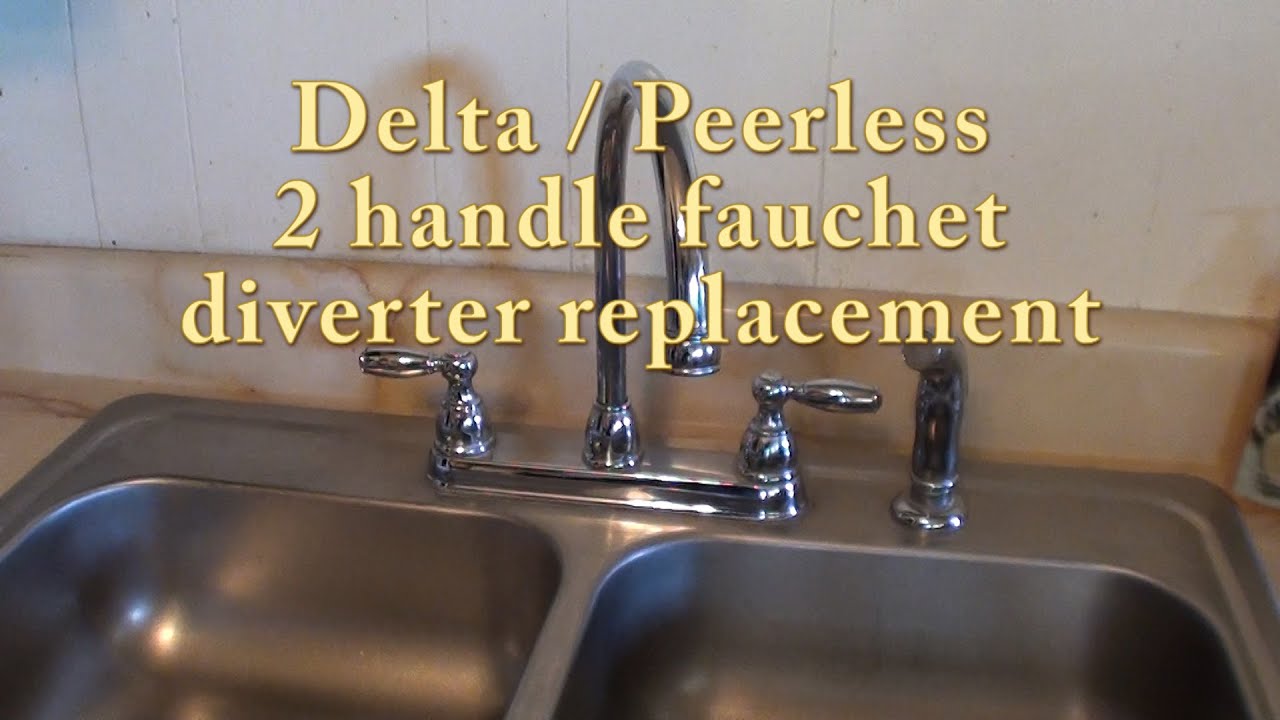
- Over time, the diverter will become worn and will need to be replaced. The diverter is a small valve located on the back of the faucet body. To remove it, use a pair of needle-nose pliers to pull it out. Push the new diverter, fins pointing out into place with your fingers. Also, remember that a clogged diverter can also bring problems, especially if it’s a pull-out kitchen sink sprayer. - Source: Internet
- Look behind the handle for a small oval. Flip a flathead screwdriver under this oval tab to pop it off and reveal the bonnet nut. Use an Allen wrench to remove that nut and the handle. Twist the neck counterclockwise to remove it from the handle. - Source: Internet
- That’s all there is to it. Easy, right? Now, if you’d like to prevent future faucet handle repair, tighten the set screw any time the handle begins to feel a little loose. This should slow the stripping process and keep the water flowing for years to come. - Source: Internet
- If your faucet handle is stripped, then this guide will show you how to fix it in a fast and easy way. Using only basic tools, the whole process should take about 10 minutes max. Learn more below. - Source: Internet
- Tip In some cases, when turning the valves off under the sink they may leak from the handle. In most cases, there is a packing nut behind the valve’s knob that you can make a 1/4-turn tighter. If you tighten this nut too much you will not be able to turn the handle, so always tighten in small increments. - Source: Internet
 To begin started, here are some tips for finding information about how to remove faucet handle kitchen sink:
- Research How To Remove Faucet From Sink-related information from credible sources. This includes libraries, websites, and even journalistic professionals.
- When researching How To Tighten Bathroom Sink Faucet Handle, it is vital to be aware of the numerous sorts of electronic media sources, such as Google and YouTube. Social media platforms, such as Facebook and Twitter, are also likely to contain information regarding How To Remove A Single Handle Kitchen Faucet With Sprayer.
To begin started, here are some tips for finding information about how to remove faucet handle kitchen sink:
- Research How To Remove Faucet From Sink-related information from credible sources. This includes libraries, websites, and even journalistic professionals.
- When researching How To Tighten Bathroom Sink Faucet Handle, it is vital to be aware of the numerous sorts of electronic media sources, such as Google and YouTube. Social media platforms, such as Facebook and Twitter, are also likely to contain information regarding How To Remove A Single Handle Kitchen Faucet With Sprayer.Video | How To Remove Faucet Handle From Sink
To obtain the most accurate information about How To Remove A Faucet Handle With No Visible Screws, it is essential to investigate the credibility of each source by reading.
This article contains multiple Remove 3 Piece Bathroom Faucet-related films from a variety of sources, which will expand your understanding about Faucet Handle Puller. Internet is an excellent resource for getting information on a range of subjects.
## Here are some crucial points concerning Kitchen Faucet Removal Problems:- How To Remove Faucet Handle From Sink
- How To Remove Faucet Handle Bathroom Sink
- How To Fix Sink Faucet Handle
- How To Remove Faucet Handle Kitchen Sink
- How To Remove Bathroom Sink Faucet Handle Without Screws

With so many websites and forums giving Remove Kitchen Faucet Handle No Visible Screws-related information, it is not difficult to locate what you require.
This is a highly unconventional method for obtaining knowledge about how to remove kohler sink faucet handle, compared to what most people are accustomed to. It permits a more in-depth examination of the content and application of information regarding How to Remove and Replace Your Kitchen Faucet.
 Methods for creating aesthetically pleasing and informative displays of How To Remove Faucet Handle No Screw information. They can be utilized in business and marketing environments to convey messages regarding How To Fix A Faucet Handle That Came Off. Consequently, we additionally supply photographs regarding How To Remove Old Faucet From Bathroom Sink.
This article concludes by providing an overview of how to remove faucet handle from sink. In addition, how to remove bathroom sink faucet handle that has no screw and Express Sewer & Drain Blog are discussed to compare your understanding of How To Remove Bathroom Sink Faucet Handle Without Screws.
