Today’s topic is How To Attach Undermount Sink To Countertop. Obviously, you can find a great deal of Install Undermount Sink Without Clips-related content online. The proliferation of online platforms has streamlined our access to information.
There is a connection between the In every issue you’ll find… and Undermount Sink Fitting Kit information. additional searching needs to be done for Install Undermount Sink Without Clips, which will also be related to How to Install Undermount Sinks.
37 Tips to How To Attach Undermount Sink To Countertop | Undermount Sink Fitting Kit
- Carefully move the pieces of concrete countertop into the kitchen. You will need extra man power as the pieces in this case weigh approximately 200 lbs each. Always wear quality work gloves and steel toed workboots when lifting the pieces of concrete. - Source: Internet
- Your choice of a reveal style should be based mostly on your visual preference. Most fabricators I know prefer the zero reveal style—arguing that it’s the cleanest. Some experts say that a positive reveal just gives you another narrow, hard-to-clean surface around your sink (and believe me, it’ll get dirty as you become accustomed to sponging messes from the countertop right into your undermount sink). A negative reveal also produces a hard-to-clean surface on the counter underside where dirt, grease and germs are likely to build up unseen. - Source: Internet
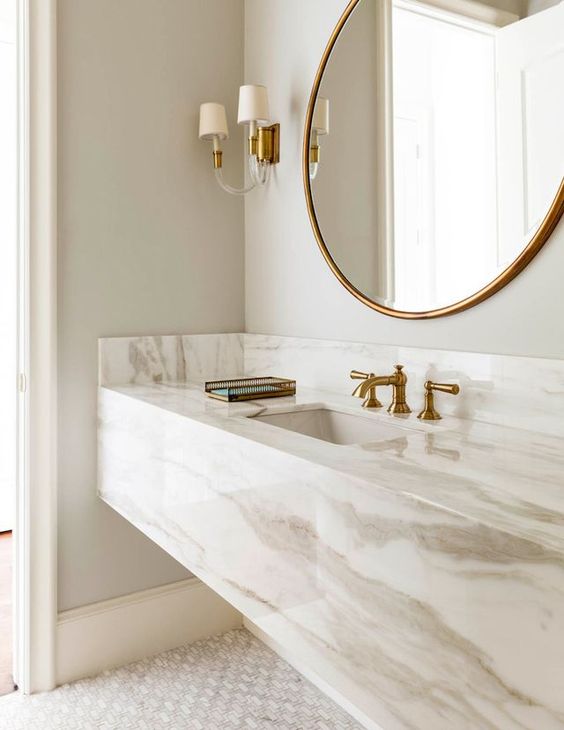
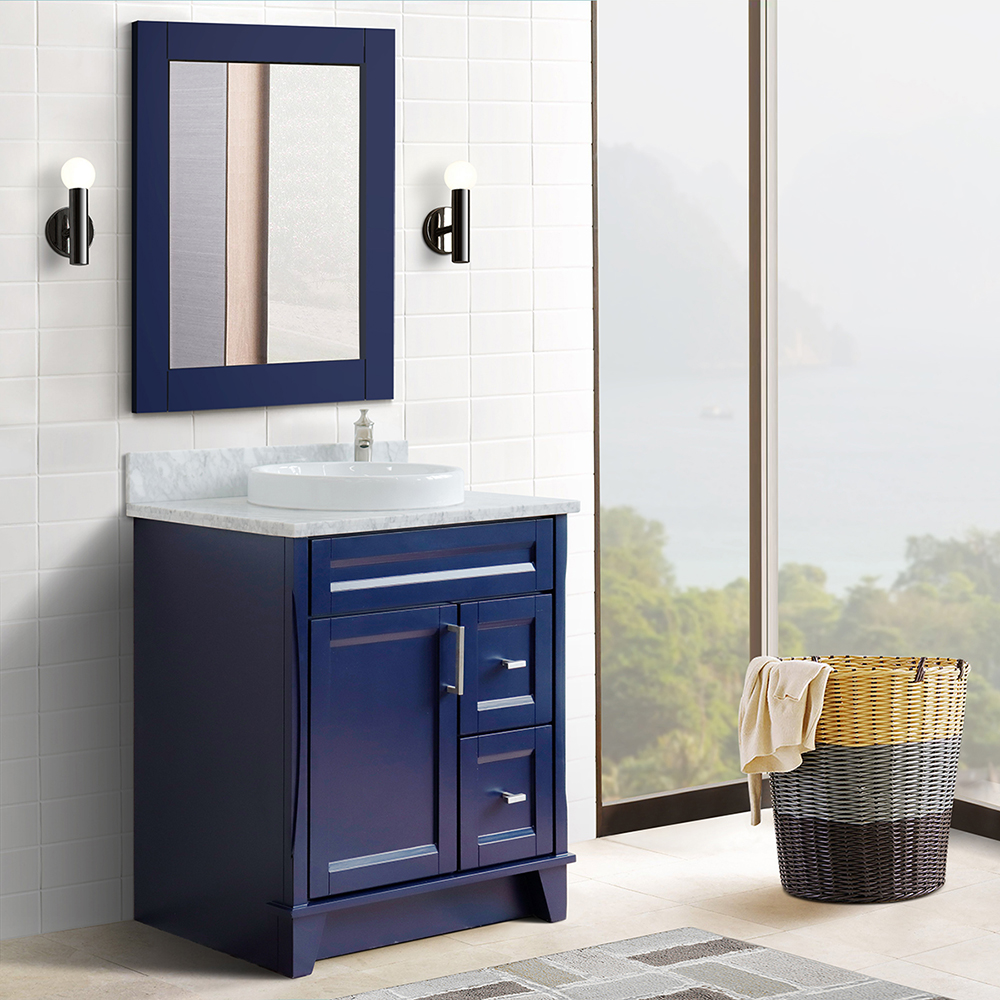
- Undermount sinks offer clean lines and easy cleaning. They look great in a modern bathroom but can also work with other styles like farmhouse or traditional. You commonly see them in porcelain but can find them in copper or stainless steel. - Source: Internet
- An undermount sink should be attached to the countertop before it’s installed on the base cabinets. It’s awkward to do it otherwise—there’s typically not enough space inside the sink base cabinet to do what you need to do. If for some reason you need to install the sink with the top in place—or reset an existing undermount sink that has separated from the underside of the counter— you’re probably going to have to cut the cabinet sides to gain access to clip fittings that secure the sink against the underside of the counter. Installing the faucet will be a pain, too. - Source: Internet
- While positive and negative reveals are options, the only option you should go for is the flush mount reveal in which the edge of the sink is aligned with the edge of counter cutout. The reason why is obvious: a positive reveal will create more areas that will need cleaning while the negative reveal will guarantee you chip part of your countertop pulling a pan out of the sink. A flushmount or neutral reveal will make life and cleaning a lot easier. - Source: Internet
- Slip the clip brackets onto the mounting studs and over the sink rim. Tighten the wingnuts finger-tight. Over-tightening risks cracking the countertop. - Source: Internet
- First, no cabinets are perfectly square or level. With precast concrete countertops, this is less of a problem. We build and pour them in our shop so we can square up the edges easily and if the cabinets aren’t level, well, that’s what shims are for. Cast in place kitchen countertops are trickier as we have to create a mold that both rests on the cabinets but is also independent of them. - Source: Internet
- Taking on and conquering these challenges, DIY style, has brought a satisfying sense of accomplishment and has created a more welcoming focal point in our home. And at the center of our shiny new kitchen is our crowned jewel: The Sinkology INSPIRE Collection Brooks II white fireclay farmhouse kitchen sink, paired with the Pfister Zuri faucet. By the way, that faucet was a dream to install! From start to finish, Sinkology and Pfister made this project much easier to handle with clear instructions that made sense and were easy to understand. - Source: Internet
- Measuring your cutouts is the most critical step in the process. You can’t patch granite if you make a mistake. Look at the installation instructions that came with the faucet for a template. If you are using an undermount sink, you will need to polish the granite edges after the cut. - Source: Internet
- With your slab ready to have the undermount sink anchored to it, you can either go for the DIY route or hire a contractor. While installing an undermount sink to a precut stone slab is certainly doable for someone with minimal experience, the benefit of hiring a contractor is that they have likely done the job dozens to hundreds of times. Precision is key to this project, to ensure no leaks or no surprise incidents in which you find your sink in the bottom of your cabinet. - Source: Internet
- We do this by laying plywood sheets down to create the base upon which we are going to pour the countertop. The plywood is usually screwed to the top of the cabinets so the countertops won’t move around but if the cabinets are not level then the plywood base will rise and fall along the length of the countertop. As we then install the molding that creates the countertop edges directly on this plywood it also tends to do the same and consequently so do the finished kitchen countertops. All this requires careful attention to detail to prevent. - Source: Internet
- We’ve had big plans for our kitchen ever since we purchased our home nearly five years ago. Aside from the wall oven that didn’t work, the kitchen was fully functional but very dated. We knew from the start that the dark wood color had to go, along with the old appliances, laminate backsplash and countertops, and old vinyl floors. - Source: Internet
- The second type of support is a custom made wood frame that mounts to the cabinet walls. The frame supports the sink by its flanges. Always leave some wiggle room between the sink bowl and the cradle so that you can align the sink with the countertop hole. - Source: Internet
- You attach the mounting hardware underneath the counter when installing a drop-in sink. Put some weight on the sink from above to eliminate any air bubbles in the silicone adhesive. Use a matching caulk color around the sink for a cohesive look. - Source: Internet
- All our countertops at Marble and Granite work with undermount sinks. Ultimately, undermount sinks can be used with any type of stone countertop, whether its marble, granite or quartz. Their installation won’t present any real problems for a professional contractor and you could even handle the job yourself if you’re handy enough. - Source: Internet
- Our friend Bryan over @diydadblog on Instagram and blog www.diydadblog.com recently renovated his kitchen and was kind enough to share about how it went. Not only did he install the Brooks ll, he created some gorgeous concrete countertops. - Source: Internet
- The countertop rests on top of a piece of 3/4 inch exterior grade plywood without knots on the surface (ABX plywood). The plywood extends the entire length of the base cabinets and will distribute the weight of the concrete countertop. If you have a built-in dishwasher below the concrete countertop, the plywood would also go over the location where the built-in dishwasher is being installed. Place a few drywall screws through the plywood, (make sure the heads of the screws are flush with the top of the plywood and do not protrude) and into the sides and back of the base cabinets just to hold it in position temporarily and prevent it from shifting when you put the concrete countertop on it for the first time. - Source: Internet
- Apply the epoxy around the corners of the sink and then quickly press the metal mount into the epoxy so that it oozes through the holes. Make sure the mounts are positioned correctly so that they lock over the edges of the sink. Once the epoxy dries, your undermount sink is good for use. Now remember, you’re looking at about 24 hours before all the appropriate compounds set completely. Even if the epoxy and silicone look dry, don’t expose them to water until after 24 hours. - Source: Internet
- Once the sink is clamped in place, get underneath and ensure it’s a snug fit. After you’re confident with the placement, lower the sink enough to apply silicone caulk around the rim of the sink. Then crank the sink flush against the countertop, lock the clamps, and let the caulk dry. - Source: Internet
- This next phase depends on whether you want to install the sink with the countertop already in place or if you want to attach the sink to the countertop and then install it all in one shot. Doing the install once the countertop is installed really depends a lot on the size of your under sink cabinets. In many cases you’ll have to drop the sink in before putting the countertop down, and in others you’ll be able to finagle the sink in through one of the cabinet doors. - Source: Internet
- This should be done before installing the countertop. Clips are included with your sink. Your countertop fabricator will supply the proper hardware to attach the sink to the countertop. Solid surface countertop hardware requirements may vary. - Source: Internet
- At Motor City Granite & Cabinets, we stock stunning Blanco Silgranit sinks. They’re deep, comfortable to use and give your bathroom a luxurious finish. Blanco sinks are available in single or double configuration and in undermount or apron models to suit your style. - Source: Internet
- Thankfully, the sink/countertops renovation phase has come together beautifully. Leveling and measurements for the sink platform, cabinet base, new plumbing, and countertops had to be executed perfectly for everything to work properly. I am sleeping much better now that the calculations and measurements are finally out of my head. - Source: Internet
- Vessel sinks sit on top of the counter and require holes outside the sink basin for the drain and faucet. You can find vessel sinks in porcelain, copper, glass, or stainless steel materials. They make a great focal point in your bathroom design. - Source: Internet
- I was wondering if anybody out there has any advice for installing a heavy cast iron undermount sink under a 3/4 inch thick Fireslate TM. (concrete) countertop. My concern is that by only using clips I will stress the concrete and it may crack or break. - Source: Internet
- Hiring professional installers at Motor City Granite & Cabinets ensures that your sink installation is completed quickly and professionally to deliver the best results. We have years of experience installing everything from drop-in bathroom sinks to undermount kitchen sinks. We offer custom design services; a wide variety of cabinets, countertops, and hardware; and installation services. - Source: Internet
- The first type of support is a commercial sink bracket sold by granite supply companies. These brackets are designed to be installed onto the cabinet frame. Follow the manufacturer’s instructions. - Source: Internet
- If you’ve decided to break away from the traditional sink install, and instead are opting for an undermount sink, there are some key things to know beforehand. First off, providing your countertop fabricator with factory specs of your new sink will be crucial. After all, you shouldn’t be cutting the hole for your sink yourself, especially if you’ve decided to install natural stone countertops. - Source: Internet
- Since you’re not going to cut the sink opening yourself, you’ll need to tell your countertop fabricator which sink and faucet you plan to install, and which reveal style (more on this in a moment) you prefer so he or she can cut the opening to the correct size and shape. Choose a sink that fits into the base cabinet below the counter with some room to spare. Your fabricator will work from a sink template, usually available from the manufacturer. - Source: Internet
- A botched installation can ruin even the highest quality countertop. Today let’s take a look at how to install an undermount kitchen sink with a focus on properly supporting the weight of the sink. Small bathroom or bar sinks are easier – they typically can be mounted directly to the concrete using the hardware provided with the sink. Kitchen sinks are too heavy to mount directly to the concrete, so special preparations must be made. - Source: Internet
- Some installers prefer to mount the sink working with the countertop right-side up. Doing so gives you a better view of the fit and look of the reveals during the final stages as the sink clips are tightened to retain the sink rim on the underside of the counter. It’s also what you have to do if you’re trying to re-install an existing undermount sink that’s delaminated and falling away from the countertop. - Source: Internet
- Note: The concrete arms that surround the sink are quite fragile and will not support the weight of the rest of the countertop. When lifting the countertop pieces hold the body of the countertop not the arms. If you apply undo pressure or leverage to the arm you are liable to crack it! - Source: Internet
- Granite countertops are a popular addition to a bathroom remodel, and this luxury stone can increase your home’s appeal to buyers if you are placing your house on the market. However, granite counters pose a challenge when it comes to installing bathroom sinks. Granite cannot be patched or recut if you make a mistake with the sink installation. At almost twice the price per square foot than many other countertop materials like solid Corian or porcelain, this can end up being a costly home renovation mistake. - Source: Internet
- When your countertop arrives—holes and all— you should have a work stand set up to support the counter so that you can work above and below without flexing and cracking it. Depending on the length and weight of the top, you might be able to get away with setting a couple of two-bys across sawhorses. A table frame minus a tabletop might also work. - Source: Internet
- Determine where the sink should be positioned on the countertop. Make sure there’s enough clearance on all sides of the sink. Underneath the countertop, carefully tape the template to the countertop and use the appropriate saw to cut the hole. If you want a negative review, cut the hole slightly smaller than the template. For a positive reveal, cut slightly larger… and for a flush mount cut the exact measurement of the template. - Source: Internet
- Position the under-mount sink on the floor of the cabinet below the cutout for the sink. Typical under-mount sinks do not have predrilled holes for faucets, so either long edge of the rims for kitchen sinks can install along the front or back edge of the cutout. For vanity sinks, position the sink so the overflow port at the upper portion of the bowl is toward the front edge of the countertop. Note the channels below the rim of the sink where the under-mount clips install. - Source: Internet
- About the author: From his past experience as a contractor and cabinetmaker, Michael Chotiner has accumulated some great “pro how-to” knowledge that he likes to share for The Home Depot. To see a wide array of under-mount and over-mount kitchen sinks, visit homedepot.com. - Source: Internet
 Following are some suggestions for where to begin your search for data on Undermount Sink Fitting Kit:
You should try to find How To Install Undermount Bathroom Sink To Granite Without Clips-related information from reputable places. Libraries, online resources, and even paid journalists all fall under this category.
- It's crucial to be aware of the various electronic media sources available when researching how to attach undermount sink to quartz countertop, such as Google and YouTube. You may also get info about Do You Install Undermount Sink Before Countertop on social media sites like Facebook and Twitter.
Following are some suggestions for where to begin your search for data on Undermount Sink Fitting Kit:
You should try to find How To Install Undermount Bathroom Sink To Granite Without Clips-related information from reputable places. Libraries, online resources, and even paid journalists all fall under this category.
- It's crucial to be aware of the various electronic media sources available when researching how to attach undermount sink to quartz countertop, such as Google and YouTube. You may also get info about Do You Install Undermount Sink Before Countertop on social media sites like Facebook and Twitter.It’s crucial to read to examine the authenticity of each source in order to acquire the greatest information regarding Undermount Sink Quartz Countertop.
Video | How To Attach Undermount Sink To Countertop
You’ll learn more about Do You Install Undermount Sink Before Countertop after watching the films included in this post, which come from a variety of different sources. Information on a wide range of topics can be easily accessed via the internet.
## Notable features of Best Adhesive For Undermount Sink To Quartz include:- How To Attach Undermount Sink To Countertop
- How To Attach Undermount Sink To Quartz Countertop
- How To Attach Undermount Bathroom Sink To Countertop
- How To Attach Undermount Sink To Concrete Countertop
- How To Attach Undermount Sink To Granite Countertop

With the abundance of how to attach undermount sink to wood countertop-related resources available online, it’s easy to find what you’re looking for.
This is not how most people would expect to learn more about How To Install Undermount Bathroom Sink To Granite Without Clips, so be prepared for some shock value. It paves the way for a closer examination of the Do You Install Undermount Sink Before Countertop information’s actual substance and its potential applications.
 techniques for making Two Ways to Install an Undermount Kitchen Sink data visualizations that are both aesthetically pleasing and practically applicable. They can spread the word about how to install undermount sink to marble countertop in professional and promotional settings. For this reason, we also include -related pictures.
At last, this article sums up key points about How To Form Sink Concrete Countertop. There is also a comparison of your Install Undermount Sink Without Clips knowledge to that of how to attach undermount sink to quartz countertop, as well as a discussion on how to install undermount sink to marble countertop and Two Ways to Install an Undermount Kitchen Sink.
