This time, we’re going to talk about How Do You Make Resin Clear After Sanding. There is a lot of information about how do you get resin clear after sanding on the internet, of course. Social media are getting better and better quickly, which makes it easier for us to learn new things.
Announcement and Sanding Clear Epoxy Resin are also linked to information about White Spots In Epoxy After Sanding. As for other things that need to be looked up, they are about White Spots In Epoxy After Sanding and have something to do with Announcement.
106 Things You Should Know About How Do You Make Resin Clear After Sanding | How To Finish Epoxy Resin
- Check the progress of the sanding process again and again by removing the sanding residues with a cloth. The epoxy resin surface should always be cleaned, especially when changing to finer grain size. Otherwise, there is a risk that the coarser, detached grains of sand will leave grinding marks again. - Source: Internet
- We always suggest wet sanding resin for which you will need waterproof sandpaper. Waterproof sandpaper is made from silicon carbide and it is available in all the necessary grit sizes. The smallest grains can cause deep grooves in your epoxy, so we suggest starting with at least 120 grit. - Source: Internet
- In some cases, your work-piece may already have largely smooth surfaces after casting. This is a huge benefit when using silicone molds in particular. In such a case, you can shorten the sanding process easily and sometimes you only need to use a relatively fine grain of sanding paper for wet sanding. Sometimes you can even dispense with wet sanding altogether and continue your work directly with the epoxy resin polish. - Source: Internet
- Use 0000 steel wool and rub in a circular motion. Allow at least 36 hours cure (brand dependant) before rubbing the coating, or it may scratch or mar rather then resulting in a satin finish. A good spray finish to put over this, is Liquitex Soluvar Spray Varnish for the satin finish. Some spray varnishes can react with cured resin, but this one has been used by numerous resin artists successfully. If your painting is going to be hung in a spot where light over high gloss is an issue, or someone prefers non high gloss finish, this is a possible alternative solution. - Source: Internet
- According to some of the best casting epoxy artists, when resin is polish sanded, it has such a different feel to it then unpolished resin. It feels like glass and looks amazing. They swear it is worth the extra effort. - Source: Internet
- Note: Putting a wax or polishing compound on unsanded resin doesn’t really accomplish much, you have to get the finish to a minimum 3000 grit polished sanding. It’s worth the work. You just lightly sand it with each grit. And you don’t need to spend hours on it with each stage, just enough so that the higher grit removes the scratches from the previous grit. Once you’re done sanding the resin will pretty much be back to shiny again, then the polish will gloss it up beautifully. - Source: Internet
- This post may contain affiliate links. We may earn a small commission from purchases made through them, at no additional cost to you. You help to support resin-expert.com - Source: Internet
- Working in resin lets us create beautiful pieces of artwork. With resin work, we can create pieces for our own pleasure, or this can be the basis of a small business based on our art skills. Creating something beautiful can be immensely rewarding, either to give as a gift or as the foundation of a successful enterprise. - Source: Internet
- What is wet sanding? Well, it’s pretty much exactly what it sounds like. It involves using water and sanding paper graded for use on wet surfaces to prepare your resin workpieces. All that you need to do is ensure that your workpiece or sandpaper is wet and ensure that you follow the same process we mentioned previously. - Source: Internet
- For polishing larger epoxy resin surfaces, such as sealed floor surfaces or extravagantly designed tabletops, you should use a suitable polishing machine if possible. The difference between a drill and a polishing machine is easy to explain (apart from the possibility of controlling the rotational speed): While the drilling machine rotates only rigidly around an axis, the polishing attachment on a polishing machine moves in elliptical or eccentric movements. This has a positive effect on the result of the polishing process. Especially as a beginner, you can achieve particularly brilliant results when polishing epoxy with a polishing machine. - Source: Internet
- Many resin craftsman, say they will not leave dribbles down the sides, or attempt to spray coat with cloudy varnish. Sanding, cutting then polishing is considered the professional finish, by many. Yes, it is a ton of work. - Source: Internet
- While we typically do not recommend it, you absolutely can dry sand resin, and there are a few instances where it is your best option. When you are working with a combination of epoxy and wood, wet sanding can cause the wood to swell which is not ideal. On the whole, it is not recommended to dry sand. The heat caused by dry sanding with an orbital sander can actually dissolve the epoxy resin. The dissolved resin will become matt, and it will take a great deal of effort to restore the luster. - Source: Internet
- You want to make sure that you have a smooth, clean surface to work with when polishing. You can do this by working your way through various grits of sandpaper: the lower the grit, the deeper the scratches on the surface. So, if you’re trying to remove a bug, or level out the surface then you are going to want to start with a lower grit and slowly work your way up, until the surface is smooth. If your surface is relatively ready and free of imperfections than you are more likely going to start with a higher grit sandpaper since the surface needs less work. Again, check out our sanding tips prior to polishing so that you’re ready to take on the polishing process! - Source: Internet
- sand with 800 Abranet. Abranet is a dust-free sanding material. On a random orbital, on high speed. - Source: Internet
- No, sanding epoxy does not make it dull. Epoxy is a very durable material and can withstand a lot of wear and tear. However, if you do sand it, it will create a smooth, matte finish. - Source: Internet
- If you’re wondering if epoxy resin can be polished the answer is yes. Epoxy resin resembles glass once it has had a chance to cure completely. Like glass, with the right polish and the right tools, you can be epoxy resin practically reflective given enough time and effort. - Source: Internet
- The dust produced when sanding resin can cause serious health problems if inhaled. The small resin particles are carcinogenic and can damage your lungs, so it is always recommended that you wear some sort of mask when you sand epoxy. Wet sanding can also help reduce the amount of dust that is produced and set airborne as you sand epoxy resin. - Source: Internet
- Sanding, Buffing and Polishing, is not always necessary. Sometimes a dome coat or a flood coat of clear resin is all that is needed (and can sometimes be the easiest). In some cases a flood coat vs wet sanding and oil/polish is a matter of preference. - Source: Internet
- Use a paper towel to dry your workpiece frequently during wet sanding. Dry sanding can produce heat. So, make sure you take breaks in between to ensure that high temperature doesn’t cause the resin to melt. - Source: Internet
- After you coat or cast and demold your epoxy, you might realize your project has a flaw—a scratch, a hair, a bump, or an uneven coat are all common mishaps that can occur. To fix these flaws, sanding is highly recommended. If you haven’t already, make sure to remove any of these imperfections before moving on to the buffing process. - Source: Internet
- For a matte finish, you simply sand the surface with 3,000-grit sandpaper. Most oil-based finishes should adhere to the epoxy or at least form a film overtop, which can clear it out after sanding. The optimal grit for most finishes is 320 or higher. Proven brands like Osmo, Rubio, and Odie’s oils/waxes have been used with great success by many customers. This will help to resist moisture while retaining a natural matte look. - Source: Internet
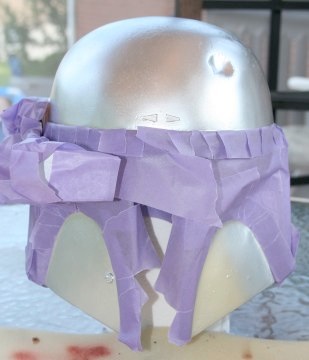
- If your piece has wood, and you’re trying to keep the wood dry (which you don’t have to), or keep the wood from too fine sanding, tape it off. That way, a little water under the tape isn’t a concern, but you can sand the epoxy to a really fine grit, and keep the wood closer to 320-400 for a finishing product. You can always dry the wood quickly after sanding with a blowdryer or heat gun on low (and keep it moving). - Source: Internet
- Well, there are actually a few possible reasons as to why your cured resin might be cloudy. It could be that you didn’t mix your resin properly, or that your curing environment was too humid. Another possibility is that you used old resin that had started to degrade. - Source: Internet
- Sanding of epoxy resin creates the perfect finished look for your resin craft. Without this step, you can not achieve the shiny and glassy look typical of resin materials. So, if you want that, you shouldn’t skip resin sanding (no matter how much you dislike doing it). Having read through this article, you must have been aware of what sanding is and how it is done. All that’s left is for you to choose the method which suits you best and start sanding. - Source: Internet
- We always recommend that you sand epoxy resin wet with waterproof sandpaper. Wet sanding is by far the best way to remove any uneven areas and it reduces the clogging of your sandpaper by the resin dust particles. As we have said already, wet sanding can also be the safer option, as the water prevents too many of the epoxy dust particles from becoming airborne. As the water gathers the dust particles, you are able to see the effects of your sanding more clearly. - Source: Internet
- When you’re prepping to polish, you’ve got to sand down your surface. You can choose either wet sanding or buffing to achieve this. With wet sanding, you’re carefully sanding from coarse grit to grit, going from 120 to 1000 in circular movements, either by hand or with an orbital sander. When getting up to the highest grit, you may find your epoxy is polished enough to your likening. - Source: Internet
- Once you’re satisfied with the job you’ve done, use a microfiber cloth to remove any excess polishing compound from the surface of your workpiece. Once the excess has been removed, give the workpiece a thorough once over with the microfiber cloth again. This repetition is the key to how to make resin shiny without the use of a Dremel. - Source: Internet
- Make sure that you only use colorless polishing paste to avoid any coloring effects on your piece. Further, make sure that after every application you use a separate clean cloth to wash off the polishing paste. Until removed, polishing paste can give an epoxy resin object a matte appearance. - Source: Internet
- If you want to regularly polish larger areas of epoxy, then the purchase of a polishing machine specially designed for this purpose will certainly pay off. With such a machine you can use different polishing sponges for polishing the resin. Also, the speed of the polishing machine can be adjusted in such a way that an optimal polishing result is possible. With a reduced number of revolutions, you make sure that the surface of your work-piece does not get too hot due to the frictional heat. - Source: Internet
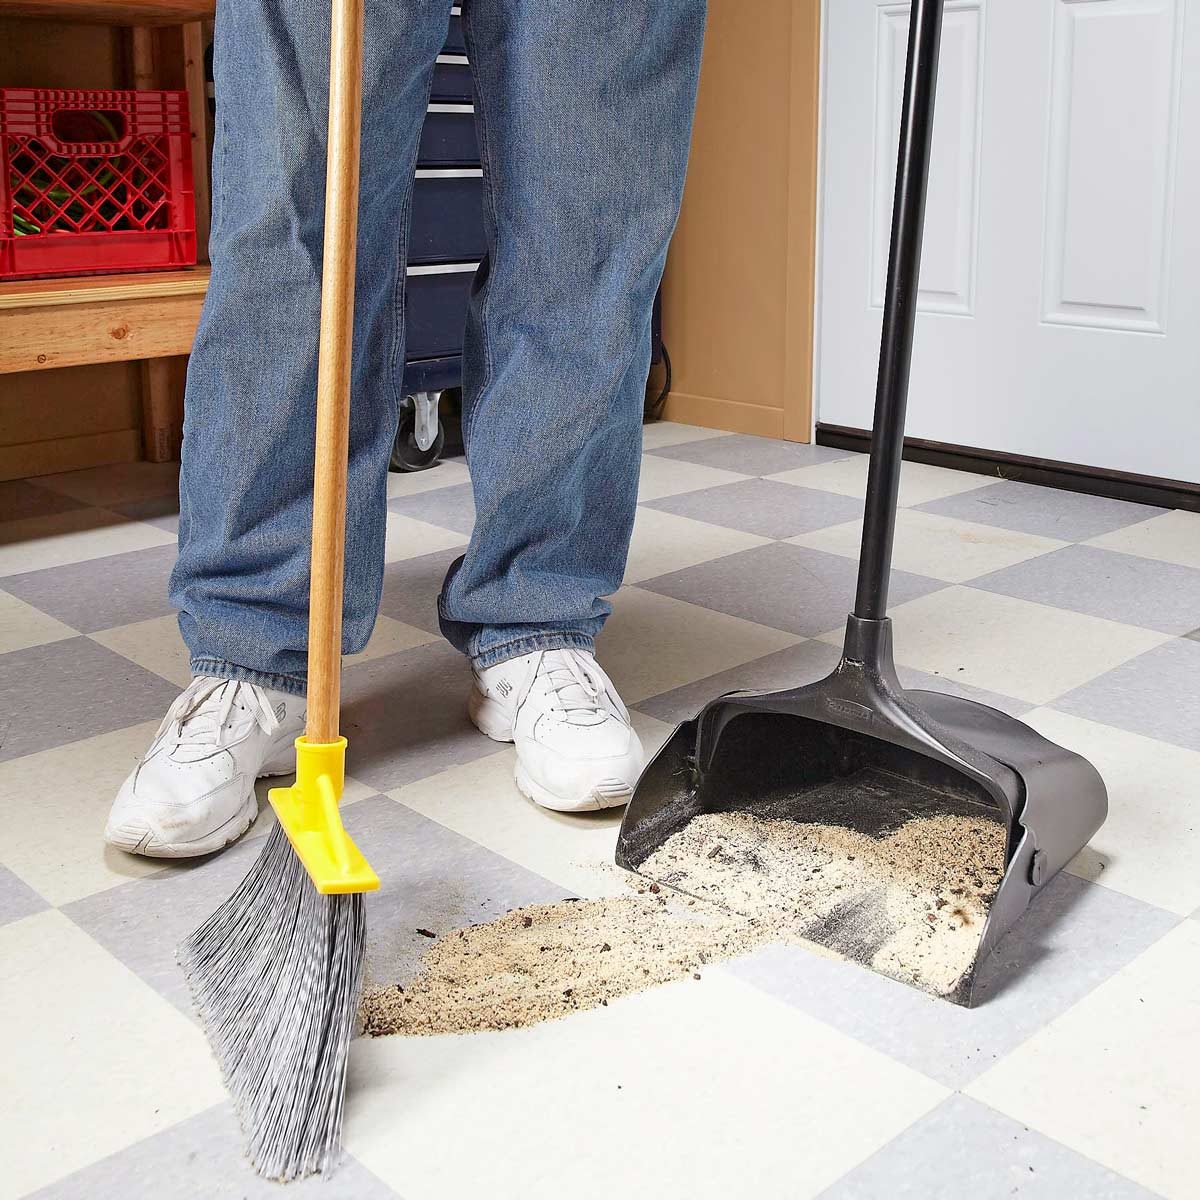
- To prepare the surface for a subsequent epoxy coating or painting work, wipe the dry surface with a paper towel to remove any remaining deposits, then gently sweep the surface with a broom. Do not use rags – they could contaminate the surface. If you want to paint the surface immediately after sanding, use an electrostatic dust cloth afterward. This will remove any dust particles that may still be present, which would worsen the result when painting. - Source: Internet
- When it comes to sanding blocks, you really cannot do better than this warner hand sander. The 12cm long block fits perfectly in your hand and allows you to easily sand flat surfaces as well as corners and curves. The dimpled rubber surface helps you to smooth out small surface imperfections. - Source: Internet
- When sanding, you start with a coarse 120 grit and work your way carefully in circular movements to a fine 3000 grit. You can do the wet sanding by hand without any mechanical assistance. Alternatively, you can also use a random orbital sander. When you have finished wet sanding, the surfaces of your epoxy resin work-piece should be even and smooth. After that, however, the actual epoxy polishing will only begin. - Source: Internet
- If only smaller objects or shapes made of resin are to be polished, it is sufficient to use an ordinary power drill with a polishing attachment suitable for this purpose. Usually, you can choose between polishing discs and polishing sponges in different sizes in the corresponding assortment. With a small polishing ball head, you can even polish very small workpieces mechanically. - Source: Internet
- Whether you’re working with wood, plastic, metal, or epoxy resin, preparing your surface is one of the most important steps in the polishing process. While the processes used to prepare these surfaces are different, they’re essential to a good-looking finish. How do you prepare a resin workpiece for polishing though? - Source: Internet
- Dry sanding produces a lot of resin dust which creates an unhealthy work environment. On the other hand, during wet sanding, the dust produced gets mixed with water and doesn’t become airborne. This, however, can be a bit messy. - Source: Internet
- If you’re a crafts enthusiastic, professional artist, or small business person who works in resin, let us help you. Plastic Materials works with arts professionals, and we can answer any questions you have about how to polish resin. Contact us today. - Source: Internet
- One way is to use a clear epoxy resin topcoat. This will provide a clear, protective layer that will make the resin less susceptible to staining and smudging. Another way is to use a clear epoxy resin primer. - Source: Internet
- This set of sandpaper sheets has everything that you need for any kind of sanding project. The sandpaper is made of waterproof silicon carbide and the electrocoating ensures that the grit is homogeneously distributed. You can easily use this sandpaper for wet and dry sanding projects. - Source: Internet
- One way is to use a polishing compound. This will help to smooth out the resin and make it shiny. Another way is to use a clear coat. This will help to protect the resin and make it shiny. - Source: Internet
- Dremel tool makes use of rotatory motion to even out resin surfaces. It can also be used to carry out epoxy resin sanding. But as with all other electric tools for sanding, you have to be careful when sanding with Dremel tools. - Source: Internet
- Wet sanding resin would be significantly more difficult if you were to use traditional sandpaper. Normal sandpaper would become soggy and fall apart with extended exposure to water. As such, if you are going to wet sand epoxy, we suggest using waterproof sandpaper. Waterproof sandpaper is made from a closed layer of silicon carbide that resists the effects of water. - Source: Internet
- Once you’ve settled on which sanding method you’d like to go with, pick a grit anywhere between 120 to 1000 and start sanding. One of the best ways to go about sanding resin is by working in a circular motion, this will ensure that no lines or accidental recesses are created during the sanding process. Once you’re happy with your sanding job, ensure that your surface is flat before moving on to the next step in the process. - Source: Internet
- Resin polish is usually a clear liquid or paste that is used after sanding. Any product that can be used for wood polishing also works great on resin. Various kinds of automobile polish also work very well with resin. You should experiment with test castings and determine what works well on the type of resin that you like to use in your castings. - Source: Internet
- You can purchase waterproof sandpaper for sanding resin in grit sizes that range from 60 to 1000. When it comes to sanding epoxy, we suggest using a grit size of 120, as this will prevent the formation of deep scratches on your resin surface. For polishing purposes, we recommend using a grit size of 1000 to create a beautifully smooth and shining surface. Here are a couple of our top suggestions for waterproof sandpaper. - Source: Internet
- Buffing on the other hand, acts as more of a filler than a remover like sanding. While buffing you are using a compound to essentially fill in the scratches previously made on the surface of your project. You work in the compound with a variable speed polisher, slowly working the material into the surface. You can do one, you can do the other, or you can do both—either way, skipping this step isn’t going to give you the glass-like finish your project deserves. - Source: Internet
- When choosing a suitable polishing compound, you may be spoilt for choice given the wide range of different products on the market. The number of different product variants reflects the multitude of possible areas of application. However, there are also polishing pastes with very different coarse or fine polishing grains. In most cases, the simple rule of thumb applies: With polishing pastes for use on wooden surfaces, you can also make epoxy resin shine. - Source: Internet
- During curing, especially at fluctuating temperatures, a slightly sticky, waxy layer may form on the surface. Its appearance changes depending on the moisture content of the air, but it is usually more noticeable in cool, humid conditions. It may be difficult to see at all, or it may appear as a thin, greasy, or dull layer. However, this so-called amine redness can be removed and underneath it, the epoxy resin should be intact. - Source: Internet
- You can shape your pieces on a 320 grit disc sander, then 400 grit dry (wear PPE designed for dust particulates). From there it’s all wet sanding 600, 800, 1000, 1200, 1500, 2000, etc. up to 3000 (some kits go up to 10,000+grit). - Source: Internet
- Once all the sanding marks are gone, now is the time for you to apply a new resin layer. This will give your resin a shiny and glassy finish. You can also use wax for this purpose. - Source: Internet
- When polishing by machine, follow the same general steps using a circular on and off motion. However, you should still be careful to use machine polishing only with resin pieces that have cured to a high level of hardness. Soft cured resin objects can warp due to heat or even breaking. A combination of machine polishing and hand polishing can be used for resin objects that have many curves. - Source: Internet
- Typically, wet sanding should always be done by hand. The combination of water and an electrical sander is a recipe for a horrible shock. There are a few different methods that you can use to wet your resin while sanding, and we will cover all of these in a little more detail. - Source: Internet
- If your resin is cloudy, there are a few steps you can take to clear it up. First, make sure that your resin is properly mixed. If you see any lumps or clumps in the resin, mix it again until it is smooth. - Source: Internet
- then use the 1200 - 1500 - 3000 Trizact clear coat sanding disc abrasives. Wet on the same random orbital. Only water, no soap needed. - Source: Internet
- After your resin embedment or piece of jewellery has fully cured you can apply numerous finishing techniques to finish the resin jewellery and refine the appearance of the article. It can be drilled, sanded or polished. As always when the possibility exists of inhaling resin dust while buffing resins, wear a dust mask. Hand Sanding and Polishing - Source: Internet
- When it comes to wetting your resin for sanding, you have a couple of different options. You can use whichever method works best for you. One of the most popular methods simply involves dipping your sandpaper block into a bucket of water every now and then to keep it wet. - Source: Internet
- When preparing a resin for good polishing you need to ensure that it has been sanded. Why do you need to sand resin before you polish it? Well, sanding ensures that the surface of your workpiece is level and that any dust has been removed from the surface you’ll be polishing. It also works to ensure that your polish adheres to the surface of your workpiece correctly and won’t be contaminated by any debris sitting on the surface. - Source: Internet
- Epoxy resin has two components; a hardener and liquid resin. When combined, the chemicals in the two components react, creating a very hard solid surface. The hardness of this resin surface can quickly dull and clog abrasive sandpaper. You will need to replace your sandpaper relatively frequently, in order to keep the sanding process effective. - Source: Internet
- When working with casting resin that is greatly affected by high temperatures, you should definitely go for wet sanding (dry sanding is a big NO in this case). This is because dry sanding produces a lot of heat which can cause the resin to melt. Wet sanding makes use of water as a lubricant which makes it less abrasive. This property of wet sanding greatly adds to the final finish of resin making it smooth and shiny. - Source: Internet
- This will help to seal the resin and prevent staining. Finally, you can use a clear epoxy resin finish. This will give the resin a glossy, protective finish that will make it easier to clean and less likely to stain. - Source: Internet
- Whether you are making an epoxy and wood table or creating beautifully hand-crafted resin goods, sanding is an essential part of the process. By sanding your epoxy, you will create a smooth and polished surface that finishes your piece off perfectly. Sanding resin can be a tricky process, especially if you are attempting to sand epoxy for the first time. In this guided article, we discuss the best methods for sanding resin and show you exactly how to sand epoxy resin to produce the best results. - Source: Internet
- As with the machine buffing, drilling must be done at slow speeds to prevent the bits from being clogged with melted resin particles. It is essential to hold the piece firmly in a vice while drilling to get a straight hole. We have found that a couple of pieces of scrap leather will enable the resin to be held firmly without marking, while drilling your holes. - Source: Internet
- Sandpapers last longer in wet sanding and are much more efficient compared to dry sanding. The resin dust in dry sanding causes the sandpaper to clog quickly hence needing replacement or cleaning. The heat produced during dry sanding can cause the resin to melt. The application of water during wet sanding keeps the temperature down, thereby preventing the resin from melting. - Source: Internet
- What is the best polishing compound for resin? This is a bit of a tricky question to answer considering that most polishing compounds, whether they have been specifically designed for use with resin or not, tend to do a pretty good job. This being said, using an epoxy resin polish will do an objectively better job, create less residue, and produce a superior sheen finish. We think that this product nails down all of these characteristics and even a bit more. - Source: Internet
- To achieve a final polish we often use a soft cloth and Brasso for buffing resins available at any hardware store. To maintain this finish a carnauba wax polish helps fill in any imperfections and provide a highly polished finished article. This wax is available at auto supply stores. - Source: Internet
- For a finer and smooth finish, you should gradually go from lower to higher grit sandpapers. Low grit sandpapers are coarser, while higher ones are finer and are used later for a smooth finish. Start sanding your resin with 150 grit sandpaper and gradually move towards higher ones. It is preferred to start with this grit size because a lower grit size can put deep scratches on the surface. - Source: Internet
- Wet sanding is mostly carried out by hand. This can lead to uneven sanding because it may be possible that you’re applying more pressure on one side without being aware of it. To deal with this issue, all you have to do is frequently change the direction of sanding. - Source: Internet
- Today, we will share information and tips concerning how to polish resin. We’ll share ideas on how to use resin polish after sanding, what epoxy objects are easiest to polish, and what the best epoxy polish compounds are. Polishing epoxy resin is easy and will make your artwork shine. - Source: Internet
- For wet sanding, you should always go for waterproof sandpapers. To ensure that your sandpaper stays smooth while sanding, you’ve to provide it with suitable backing. You can do so by wrapping it on a rubber sanding block. - Source: Internet
- Wet sanding can get quite messy. So, if you opt for that, ensure that your workspace is covered properly with a newspaper or tarpaulin. Use a paper towel to dry your workpiece frequently during wet sanding. - Source: Internet
- Wondering how to polish epoxy resin? The process of polishing epoxy resin is pretty much the same one you would follow when polishing any other surface, and it even uses similar (if not the exact same) polishing products that you would use when polishing things like wood and metal. This being said, let’s have a look at what you need to do to ensure that you get the best finish possible when polishing your epoxy resin workpiece. Here are some of the things you will need: - Source: Internet
- Dry sanding produces a lot of resin dust which creates an unhealthy work environment. On the other hand, during wet sanding, the dust produced gets mixed with water and doesn’t become airborne. This, however, can be a bit messy. Sandpapers last longer in wet sanding and are much more efficient compared to dry sanding. The resin dust in dry sanding causes the sandpaper to clog quickly hence needing replacement or cleaning. - Source: Internet
- This waxy layer is not much visible; however, it can hinder the sanding process and spoil the final look. This layer also prevents the adhesion of the resin to the next coatings and other substances. But worry not. Below are a few ways you can get rid of amine blush: - Source: Internet
- Due to the waxy surface, sanding with normal sandpaper does not work, as it will clog up immediately. Amine redness is not a problem in itself: it is the effect of it that is the problem. If you continue to work without removing this layer, it will prevent lacquers, other epoxy coatings, and other substances from bonding effectively and ensuring adhesion. The surface should therefore definitely be cleaned. Here is a great method for removing amine blush from your resin projects: - Source: Internet
- In principle, it is possible to carefully polish the surface of almost any type of work-piece or resin sealant for a great shine. Of course, this works easier with a corresponding size of the work-piece or a larger area of the sealant than it might be the case with very small work-pieces with many edges. Epoxy polishing usually works without any problems for the following applications: - Source: Internet
- The powdered resin removed from the resin product gets added to the abrasive paper, thereby making it dull and ineffective, thus requiring it to be cleaned or even replaced frequently. Another main concern when sanding epoxy resin is the harmful effects of powdered resin. When inhaled, this powder can get absorbed easily into our respiratory lining because of the small size of its particles. This, in turn, can cause irritation and/or inflammation of the respiratory tract and lungs. - Source: Internet
- When it comes to sanding epoxy resin, there are a few things that you should be aware of. Epoxy resin can be tricky and a little risky to sand, but with the right tips and tricks, you will be able to sand epoxy safely. The main difficulty when sanding resin lies in the hardness of the surface. The main safety concern when sanding epoxy lies in the toxicity of the particles. - Source: Internet
- This is the part where water comes in the process of wet sanding. You have to make your resin wet quite frequently during this process. You can do so by dipping your resin in water or by using a spray bottle. Once you’ve made your resin wet, you can continue your sanding. - Source: Internet
- Let’s assume that you’re sanding from left to right. Once you see the edges turn white, stop sanding and make your resin wet. Use a paper towel to dry it partially. - Source: Internet
- The sandpaper lasts longer as it doesn’t get clogged during sanding. This is because the added water quickly removes resin dust from the surface of the material. Resin dust produced is much lower, providing a much safer environment for working. - Source: Internet
- One of the many reasons we love crafting resin products is their glassy and smooth finish. However, to achieve that, you’ve to put in a bit of effort by sanding your epoxy resin. After properly sanding epoxy resin, you get a polished and smooth surface that is like a cherry on the top. Another reason why you need sanding is to get rid of sharp edges. This ensures that the finished product doesn’t hurt the users. - Source: Internet
- Dry sanding produces a great amount of resin dust. So, make sure you’ve your dust mask on before starting. Start from a grit size between 80 to 120 and gradually work your way up towards 1000 or 1200 grit size. - Source: Internet
- One possibility is that your epoxy was not completely cured before you sanded it. If your epoxy is not fully cured, it will be more susceptible to scratches and other damage from sanding. Incomplete curing can also cause your epoxy to yellow over time. - Source: Internet
- While dry sanding may not be recommended, there are scenarios where dry sanding is the best choice. Dry sanding of resin is the option when you have to sand larger surfaces. When working with resin that has wood incorporated in it, you cannot go for wet sanding as it can cause the wood to absorb moisture and swell. In such cases, you must use dry sanding. - Source: Internet
- Yes, you can polish resin with toothpaste. Toothpaste is a mildly abrasive material that can be used to remove scratches and other imperfections from surfaces. When polishing resin with toothpaste, it is important to use a non-abrasive toothpaste and to avoid using excessive pressure, as this can damage the resin. - Source: Internet
- Epoxy resin is one of the most versatile substances on the face of the planet. These days, it’s used in pretty much every industry on the face of the planet, in fact, more and more applications are being discovered for this miracle substance every single day! It can be really challenging to work with though, different brands and even different types of resin can produce different finishes, even the mold you use can obscure your finish. This being said, let’s have a look at epoxy resin polishing, what it is, how it works, how you can use it to resurface and maintain the finish of your resin workpieces. - Source: Internet
- There are several types of epoxy resin polishing compound on the market. We recommend that you experiment with each type of epoxy polishing compound available. As previously stated, automotive and wood polishes can work very well with resin jewelry and other small objects. - Source: Internet
- Please note that unlike the polyester resins, epoxy resins such as Crystal Cast Clear will not develop a high gloss on polishing. Finishing resin jewellery of this material to a high gloss requires the surface to be recoated with the epoxy resin or use Aristocrat or Envirotex Lite. (More information on resins for jewelry here) - Source: Internet
- Polishing epoxy resin, like all other steps, is actually an indispensable part of working with epoxy resin in various projects. Only with careful polishing can the shine be created that turns a nice craft idea into a true work of art. But this only works if you lay the foundation for a perfectly polished resin surface by sanding (with different degrees of grain size) before the actual polishing. If unsightly sanding marks are not removed carefully enough during this initial step, even the final polishing cannot produce the desired surface quality. - Source: Internet
- In this first step, you start with the sanding of epoxy resin through the so-called wet sanding. First of all, you need ordinary tap water and special sandpaper that is suitable for use in wet conditions. The decisive criterion for this is the application of the abrasive grains on a waterproof fabric that cannot tear when wet under mechanical stress. - Source: Internet
- All epoxy resin objects can be polished, but the methods that you use will depend on what kind of object you are polishing. The rule is that softer cured resin objects should be polished by hand, and hard cured resin objects can be polished with a buffing wheel or drill head. Smaller objects should be polished by hand if possible or with a buffing wheel. Hand polishing is the correct option for small objects that have many curves. - Source: Internet
- Polishing your workpiece is a bridge you’ll have to cross if you’re looking to get that perfect finish for your resin castings. This being said, there are a few ways you could go about polishing your workpiece, you could either polish it by hand or you could use a Dremel if you’d really like to get the job done quickly. Let’s have a look at the best way for you to get your workpiece as shiny as possible. - Source: Internet
- First things first, put on a dust mask. Sanding produces resin dust which can be quite hazardous when inhaled. Make sure that resin is completely dried before sanding. - Source: Internet
- Waterproof sandpaper is used for wet sanding of epoxy resin. Waterproof sandpapers come in various grit sizes ranging from 60 to 4000. Using waterproof sandpaper is the best method for sanding epoxy resin for two reasons: - Source: Internet
- When wet sanding the idea is to use progressively finer grits of sandpaper until the grit that you’re using is so fine that it leaves behind virtually no evidence of sanding. You could start with 400 grit, then move to 600 grit, then to 800 grit, and then eventually to 1000 grit. Wet sanding is usually reserved for larger resin surfaces as it reduces the amount of dust produced in the sanding process, or at the very least ensures that it doesn’t become airborne. - Source: Internet
- When sanding epoxy resin, you’re going to want to do it either by hand with a sanding block, sanding paper, or with an orbital sander. If you’re working with a larger workpiece, the orbital sander might be the better choice considering the amount of elbow grease you’re about to sink into this process. We do not recommend using a belt sander as it will chew up your workpiece. - Source: Internet
- Wet sanding is usually done by hand. Do not use an electrically operated grinding machine if you are sanding wet, as you could otherwise suffer an electric shock. As an alternative, you can use an air-powered sander for large surfaces. Here is a brief video tutorial for wet sanding a resin coaster. - Source: Internet
- Tip 1: After a few minutes of patient polishing, doubts often arise as to whether the surface will ever have the desired shine. It is not uncommon, however, that the matt appearance of an epoxy resin surface is actually only due to residues of the polishing paste on the epoxy resin. If, on the other hand, you regularly wipe off these polishing residues with a soft, clean cloth, you will always be able to keep a close eye on the progress of polishing. - Source: Internet
- Air-powered sanders are tools that make use of compressed air to power rotating sanding discs. Air pressure is controlled by a button present on the sander. Electric sanding machines are powered by electricity to perform sanding. These tools are to be employed when you want to carry out dry sanding of your resin. - Source: Internet
- The first thing to do when starting resin dusting is to put on a dust mask. This is to prevent inhaling resin dust, which is hazardous and can cause irritation and inflammation. Even though wet sanding doesn’t produce much dust but better safe than sorry. - Source: Internet
- Make sure that resin is completely dried before sanding. Wet sanding can get quite messy. So, if you opt for that, ensure that your workspace is covered properly with a newspaper or tarpaulin. - Source: Internet
- Rub with the cloth in careful circular movements over the surfaces of your resin work-piece to be polished. You should apply light pressure. But don’t be surprised if you notice a visible effect only after some time. It may take a little longer until the surface you are working on finally reaches the desired gloss. - Source: Internet
- The purpose of polishing pretty much any surface is to obtain a clear surface finish, this is why metal objects like brass, silver, and even gold are polished to maintain a pristine aesthetic appearance. Does the same principle apply to epoxy resin? Well, yes it does. Besides things like the molds and the quality of resin you use, simply sanding your workpiece to get rid of excess material can leave the surface murky and scratched up. This is where the practice of polishing your resin workpieces comes into play. - Source: Internet
- After every pass, ensure that you wipe away any of the milk-like residues that have built up on your workpiece. Once you are happy with the job you’ve done sanding the surface, ensure that all the residue has been removed. Your surface should be completely dry before any polish has been applied to the surface of your workpiece. - Source: Internet
- Dry sanding can produce heat. So, make sure you take breaks in between to ensure that high temperature doesn’t cause the resin to melt. Go from the lowest grit size of sandpaper to the highest grit size gradually. - Source: Internet
- Next, check your mold for any defects or imperfections. If you see any bubbles or cracks in the mold, discard it and start over with a new one. Finally, place your resin in a sunny spot to cure. The UV rays from the sun will help to clear up any cloudiness in the resin. - Source: Internet
- Actually, there are not many pitfalls lurking in cast resin polishing. Nevertheless, you should always work very carefully and thoughtfully during this step in order to get a nice shiny surface in the end. With the right polishing paste, for example, epoxy resin can be made to shine very well. Further factors for an optimal result are the choice of the polishing sponge used and the set speed of the polishing machine used. - Source: Internet
Video | How Do You Make Resin Clear After Sanding
To get the best information about how to make epoxy resin clear after sanding, you should read to find out how true each source is.
This article has a few videos from different places about How to Polish Epoxy Resin – The Ins and Outs of Polishing Epoxy Resin that will help you learn more about it. The Internet is a great place to find out about a wide range of things.
## Here are some crucial points concerning how do you get resin clear after sanding:- How Do You Make Resin Clear After Sanding
- How To Make Resin Clear After Sanding
- How To Get Resin Clear After Sanding
- How Do You Get Resin Clear After Sanding
- How To Make Epoxy Resin Clear After Sanding

With so many websites and forums that talk about White Spots In Epoxy After Sanding, it shouldn’t be hard to find what you need.
Most people are used to getting information about how do you make resin clear after sanding in a very different way than this. It lets you look at the information about Sanding Epoxy Resin – The Best Guide for How to Sand Epoxy Resin and how it can be used in more detail.
 ways to put information about How To Finish Epoxy Resin in a way that looks good and is useful. They can be used in business and marketing, and they can also be used to talk about Sanding Clear Epoxy Resin. So, we also give you some pictures about Can You Polish Resin With Toothpaste.
In the end, this article gives a summary of How To Make Dull Resin Shiny. Also talked about are Can You Polish Resin With Toothpaste and how do you get resin clear after sanding, which you can use to compare how much you know about How To Make Resin Shiny After Sanding.
